Scouting Notes: 2021 AFLU19s – Western Australia vs. South Australia
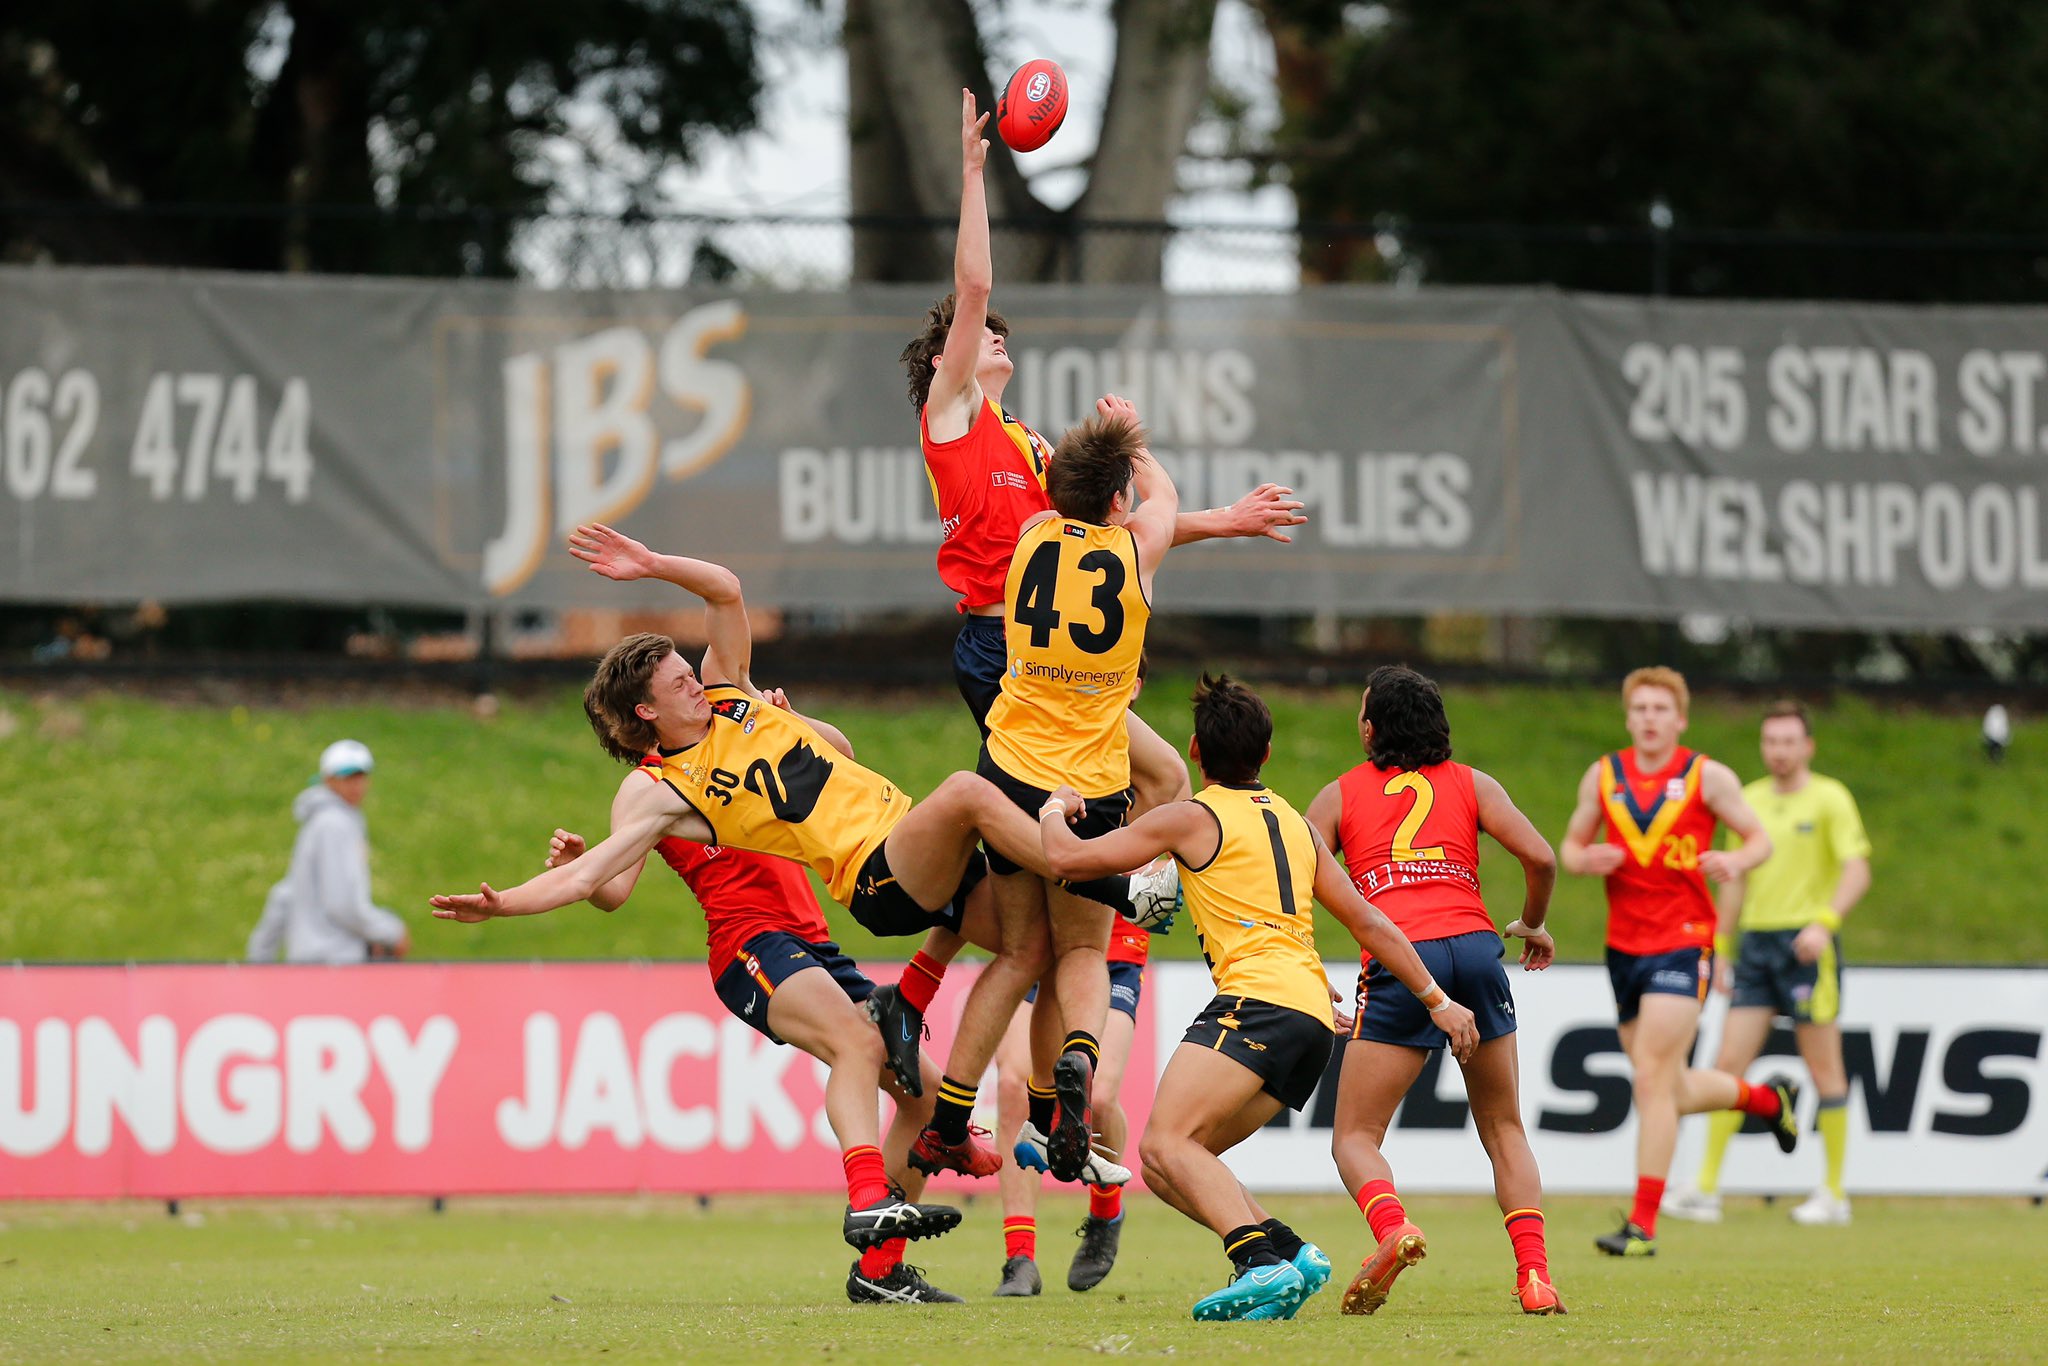
THE 2021 AFL Under 19 National Championships got underway on Saturday in a last-minute clash between Western Australia and South Australia at Lathlain Park, with the hosts getting up 9.13 (67) to 5.8 (38). In a bumper edition of Scouting Notes, we take a look at the performances of every player afield, including some defining showings from top draft prospects. All notes are the opinion of the individual author.
WESTERN AUSTRALIA #1-19:
By: Ed Pascoe
~
#1 Jesse Motlop (South Fremantle)
The Fremantle NGA member didn’t have that four-quarter performance he would have been after, but still managed to show his eye-catching traits – starting in the first quarter with a trademark rove and snap goal, showing his forward craft. Motlop provided great pressure and second efforts in the second quarter, but was very quiet in the third quarter before moving into the midfield in the last and winning plenty of the ball, while also taking a few marks around the ground.
~
#2 Jed Hagan (East Fremantle)
The only 2022 draft prospect to take the field, Hagan looked as comfortable as anyone out on the ground and showed plenty of composure and competitiveness down back. Hagan provided some meaningful drive of half-back, often using the ball well by hand and foot, but it was his competitiveness for his size that really impressed. In one instance he won a contest against SA tall forward Morgan Ferres, who had been beating most taller opponents all day in marking contests. A consistent four-quarter performer, Hagan looks a great prospect for the 2022 draft.
~
#4 Judd McVee (East Fremantle)
The speedy half-back didn’t do a lot wrong, playing a new position this year after showing signs as a midfielder at Under 16s state level. McVee was smooth in most things he did with ball in hand, using it by hand and foot and looking stylish in the way he carried the ball from defence. Although his production wasn’t as high as other teammates in defence, his slick ball use and role was still very important.
~
#7 Angus Sheldrick (Claremont)
It was a typical game from Sheldrick with the strong bodied midfielder showing his contested prowess around the ball, and equally strong drive and attacking mindset. Sheldrick’s kicking wasn’t at his best standard and he could have kicked a nice goal on the run which ended up hitting the post, and that kicking will be something he continues to work on. His attack on the ball, however, is just about the best amongst this year’s draft crop – winning some free kicks from some courageous plays. His third quarter was his best highlighted by a one-handed intercept mark and another play brushing off an opponent with ease to kick long inside 50.
~
#9 Max Chipper (Swan Districts)
Chipper was a late in for the injured Neil Erasmus and he made the most of his call-up to be among his side’s major ball winners playing on the wing. Chipper did well to work into defence to be an outlet for a switch and his ball use from the defensive half was solid. Although not the quickest with ball in hand, his work-rate around the ground helped him take plenty of marks and contribute well in transition for WA.
~
#12 Lochlan Paton (West Perth)
One of the pressure forwards for WA, Paton played his role well despite his low production and he was rewarded late in the game with a nice intercept mark and snap goal. Paton’s pressure and ability to get some timely smothers in set up plenty of scoring opportunities for his teammates and despite a few unlucky free kicks given away, he kept up his pressure for all four quarters. A midfielder for the last few years, Paton has fared well in this forward role of late.
~
#13 Bryce Watson (Swan Districts)
The athletic small defender didn’t lose too many contests as his leap and speed gave the SA forwards a lot of trouble, with some nice spoils and an ability to close down his opponents on the lead. Watson’s kicking wasn’t to a great standard at times but his work by hand was often clean and creative, and he showed a solid mix of defending and attacking. His strong contested intercept mark in the third quarter was a real highlight.
~
#14 Taj Woewodin (East Fremantle)
The Melbourne father-son prospect had a solid game playing on the wing and across half-back, showing safe decision making with ball in hand and good skills by hand and foot. His knack of taking intercept marks showed his ability to read the play well and he almost kicked a nice goal from long range in the second quarter, but just missed. It’s been a solid year for Woewodin, with that consistency on show in his game against SA in an as-expected sort of performance from him.
~
#15 Finn Gorringe (East Fremantle)
The captain of WA was a steady head in defence, often using the ball well by foot and barely losing a one-on-one contest. It was no surprise to see him favour his kicking over handballing, with some very nice kicks well weighted to his teammates. Although this game wasn’t his most productive, he still managed to show why he was made captain of the side.
~
#18 Josh Browne (East Fremantle)
Although it took until the second half for Browne to really get going, it turned out a rather typical performance form the East Fremantle ball magnet with his ability to win the ball on the inside and outside. Browne’s consistency by foot was just about his only blemish with some great kicks inside 50 but a few poor kicks as well, which where uncharacteristic. Where he excelled was his ability to win the contested ball and feed out nicely by hand, and while usually winning plenty of the ball in the middle, he also managed to win his fair share while playing at half-forward – taking a few marks and being a great outlet. He would finish as one of WA’s most productive players for the day.
~
#19 Kade Dittmar (East Perth)
A typical performance from the inside midfielder who won his fair share of his disposals at the coal face, using his big frame to his advantage. His ability to break tackles was on show, as was his ability to stick the hard ones, which earned him a free kick in the second quarter where he would slot his only goal for the game. Although his kicking at times was poor, his ability to win clearances cleanly and not just with his strong frame was very promising.

WESTERN AUSTRALIA #20-43
By: Declan Reeve
~
#20 James Tunstill (East Perth)
Having produced a good season to date at WAFL Colts level, Tunstill took the opportunity against South Australia to put his name in the mind of recruiters with a strong display, particularly in the first half. Early on it felt like Tunstill was involved in every bit of WA play, winning the ball from stoppages or receiving a releasing handball to move the ball forward quickly. He timed his runs well and positioned smartly around contests to be in the best spot to win it. In the thick of it, Tunstill did well to keep the ball away from opponents, then fire out sharp handballs to teammates in space. What was arguably most impressive about Tunstill’s game was how he tracked the ball on the ground and refused to be knocked off balance, winning the ball against opponents and flicking it up to teammates before he could be brought to ground.
~
#22 Jack Avery (Perth)
Having experienced the intensity of WAFL League level, Avery looked mostly composed in the defensive 50, using his strength and size to take intercept marks or throw a fist in to impact an opponent’s attempt when required. Later, he would also followed up with safe ball use to keep WA in possession. In the moments that Avery did push up the ground, he wasn’t afraid to take on opponents and try to hit the most aggressive option.
~
#23 Matthew Johnson (Subiaco)
The highly touted WA midfielder showed exactly why he is in first round consideration with a skilful display. Whilst Johnson isn’t the fastest player going around, his decision making and evasion in traffic gives him more than enough tools to appear quicker than most opponents, able to spot out a target in the thick of things and execute the skill well. Johnson’s work-rate meant that he was always a chance to impact the play, going in to win it himself or working hard forward of the ball to provide an option, then following up with clean ball use to keep WA going forward. That same work-rate saw Johnson impact inside his defensive 50 more than most other midfielders and worked it out well. When Johnson had the ball he more often than not looked to move it into the corridor to open up the forward 50 for his side.
~
#25 Ethan Regan (East Perth)
A game of almosts for Regan saw him show off his best athletic traits in patches, just lacking consistent impact across the game. Regan did well to win the ball below his knees on the move for a taller player, consistently picking the ball up off on half-volleys and turning his opponent around quickly, before moving the ball on by foot. His kicking inside 50 was superb, setting up multiple scoring opportunities by hitting up leading targets rather than bombing long, although he did kick a great goal from outside 50. Regan also utilised his leap to take the ball in the air uncontested, with his intercept of a chip kick in the midfield the best example of this.
~
#29 Jacob van Rooyen (Claremont)
After making a name for himself as a tall forward option over the past couple of years, van Rooyen has been playing in defence at state level recently, continuing his development in the role with an impressive display. van Rooyen was rarely beaten through the contest, able to spoil the ball when caught behind his opponent, but more often bodying his opponent to protect the drop zone and take the mark. van Rooyen’s disposal was good throughout the game, looking to use it safely out of the defensive 50 but aggressively when going into the forward half. His defensive work-rate stopped a few promising SA plays, working hard to impact the ball on the goal line early on in the game, and then building more confidence to leave his opponent and take marks in front of packs, or fill the hole in defence to take marks from rushed kicks further up the ground.
~
#30 Jye Amiss (East Perth)
Amiss had an outstanding display, with his two-goal first half particularly impressive. His opening major was the first of the game, where he was held without the ball in a pack inside 50, earning a free kick and kicking well from straight in front. His second was arguably the highlight of the day, collecting a half-volley along the boundary line inside 50, where he took a couple of steps to balance and slotted the goal from about 40 out. Apart from two goals, Amiss showed off his danger on the lead, where he managed to get separation from his opponents easily and held the ball out in front, more often than not looking to pass it off to a teammate leading towards him or hand it off to a runner if he was further up the ground. In keeping teammates involved, he ultimately sacrificed what could’ve been a four or five goal game. It was promising to see Amiss actively look to push up the ground and take marks on the wings, keeping the SA defence guessing and allowing other teammates to be the main target inside 50 at times.
~
#31 Eric Benning (Claremont)
Although Benning wouldn’t have put up massive numbers compared to some of his other tall teammates, the Fremantle NGA hopeful’s athleticism caught the eye with his leap and agility particularly impressive for his size. This was highlighted best with a few marking contests where Benning was caught behind but still managed to take a mark over the top of his opponent, or took a clean one grab pick up below his knees and weaved through traffic.
~
#34 Corey Warner (East Fremantle)
Playing in his usual wing role, Warner had a few key moments especially early on in the game. Pushing to be an option in the corridor when the ball was on the other wing, but also showed his willingness to win the inside ball and work through traffic with his evasiveness, or at times, sheer strength when pushing opponents away. It was encouraging to see Warner lose opponents by turning them inside out and then getting the ball to a teammate with his quick hands or inside 45 kicks.
~
#36 Rhett Bazzo (Swan Districts)
This was somewhat a breakout performance for Bazzo, showing off his reading of the game by taking plenty of intercept marks, but also able to drift across the front of packs and take marks out in front, quickly playing on with the ball. Bazzo more often than not looked to switch the ball across the 50 when he won it, putting it in front of his teammates so they could keep running after they had taken the mark. Bazzo was also confident when pushing up the ground, providing as an option in the corridor, even earning himself a free kick and 25m penalty, unfortunately unable to convert the goal from 50 out, although this was one of very few blemishes on his long kicking with his kick ins from SA behinds often getting distance and kick starting offensive plays. What was arguably most impressive from Bazzo was his two way running, where he’d push back hard when SA won the ball to impact contests inside 50, even spoiling a ball right on the goal line.
~
#38 Brady Hough (Peel Thunder)
The only other multiple goal kicker apart from Amiss, Hough enjoyed a solid display where he showed off some smart leading patterns in the forward half, able to get separation with ease, getting used more often as the game went on and he started to stamp his authority on the contest. The first of his two goals came from a free kick inside 50 where he went for a ground ball and had his legs taken out from under him, kicking it from right in front with ease. The second was more challenging, where he had a set shot pressed into the deep pocket and put it through.
~
#40 Jake South (Subiaco)
South took advantage of a relatively weaker SA ruck division and flexed his muscle to win most hitouts by outbodying his opponents in the ruck, initiating contact and knocking them off balance to control the stoppages. South grew in confidence as the game went on, starting to take the ball out of the ruck and taking on opponents himself. South also positioned well behind the play, taking intercept marks and looking solid below his knees.
~
#43 Jack Williams (East Fremantle)
Struggling in front of goal for the day, Williams still looked a dangerous option in the forward 50 where his strength was too much for the SA defenders to handle at times, taking contested marks without really looking challenged. That same strength gave him an advantage when he took ruck contests inside 50, pushing opponents out of the way and taking the ball himself or tapping it straight down in front of a teammate. Williams’ work-rate in the forward half can’t be overstated, consistently providing repeat leads and drawing an opponent to free up space for a teammate to lead into. He did get himself on the scoreboard to reward his efforts, pushing an opponent under the ball and taking it over his head, slotting a goal from right in front about 35 out.

SOUTH AUSTRALIA #1-18:
By: Tom Wyman
~
#1 Isaiah Dudley (Central District)
The Adelaide NGA prospect had a quiet start to the game, as South Australia struggled to get the ball past the halfway mark in the early stages. With the Western Australia midfield controlling the game, the small forward was starved of opportunity to impact the game. However Dudley had his moments as the game wore on, particularly when moved into the midfield for the final term. His speed and run and carry was evident in patches, as was his clever football smarts, however the nature of the game denied the Central Districts teenager of an opportunity to assert himself.
~
#2 Blayne O’Loughlin (North Adelaide)
It was a tough day for North Adelaide defender Blayne O’Loughlin, who wasn’t able to assert his usual calmness upon the contest. Given a close-checking role on dangerous WA forward Jesse Motlopfor much of the game, O’Loughlin struggled defensively as the son of Kangaroos and Power star Daniel gained separation and booted a regulation goal early in the piece. Although he looked more composed down back as the game wore on, nailing a couple of kicks in the defensive-50, he wasn’t able to impact with his usual offensive flair. An uncharacteristic turnover by foot in the final term gifted the home side with the easiest of goals.
~
#5 Jase Burgoyne (Woodville-West Torrens)
Port Adelaide father-son Jase Burgoyne was one of the croweaters best on a difficult day. Stationed across half-back, his work rate and two-way running was admirable. He was involved in much of South Australia’s offensive play, with a couple of nice passages of run and carry along the wing reinforced by some clean ball-use. However he was also quick to run back and offer support when the visitors were under siege down back. The talented utility, who made his SANFL league debut with Port Adelaide earlier in the year, was efficient by foot but his disposals lacked damage. Overall, it was a solid if unremarkable display from Burgoyne, who appears likely to join the Power come draft night.
~
#6 Lachlan Grubb (Central District) The speedy 19-year-old small forward struggled to impact the game, but he certainly wasn’t alone. Grubb had a couple of ‘nearly’ moments, including a smart rove and quick snap at goal which ultimately fell short but, like Dudley, wasn’t favoured by the nature of the contest.
~
#8 Lewis Rayson (Glenelg)
The South Australian vice-captain was one of the visitors best performers in their 29-point defeat. Despite being stationed across half-back in the first couple of quarters, the Glenelg product strolled forward and registered the first genuine shot on goal for SA, a long-range attempt which was touched on the line. Under immense pressure, with the WA midfield sending it inside-50 regularly, Rayson was one of few South Australian’s to exhibit calmness and composure with the ball. Rayson’s run out of defence was important and his quick hands were noticeable. His kicking was largely clean, albeit for a costly turnover in the final term. He pushed up into the midfield at-times as the SA coaching staff looked to shuffle the magnets, but looked at home at half-back, where he read the play well and was able to take a couple of strong intercept marks.
~
#9 Hugh Jackson (North Adelaide)
Hugh Jackson managed to get his hands on the ball often, but didn’t have the impact on the contest he would’ve liked. Starting on the wing before given a stint on-ball, the skilful Rooster was clean by hand in the clinches, but got caught trying to do too much a couple of times on the broadcast wing. He had a snap on goal after a nice bit of roving, but had an inconsistent day by foot, with some kicks finding their targets and others missing. Nevertheless, he demonstrated a natural ability to find the footy around the ground.
~
#10 Isaac Birt (South Adelaide)
South Adelaide’s Isaac Birt ran hard up and down the wing all day, working relentlessly to consistently provide an outlet option on his side of the ground. He was able to use his precise left-foot on a couple of occasions and was largely clean with his ball-use. A draft bolter who has risen to become one of the SANFL Under-18s best players this season, Birt showed some run and dash and produced an admirable performance for South Australia.
~
#12 Cade Kennedy (West Adelaide)
The West Adelaide skipper started the game in the midfield. He got his hands on the ball early but was lacked some cleanness with his first touch. He tackled hard and spread well across the ground to provide an option between the arcs. He found key forward Lukas Cooke inside-50 with a nice kick against the flow of play in the first term, then later released defender Lewis Rayson with a clever gather and intelligent handball. Although he faded out of the game, Kennedy had a couple of nice moments in difficult circumstances.
~
#13 Nasiah Wanganeen-Milera (Glenelg)
Wanganeen-Milera was clearly South Australia’s best player in the tough loss. One of few to show poise and execute under pressure, the Glenelg teenager looked up to the level immediately. The wingman used the ball intelligently and his work under pressure was outstanding. Whilst many of his teammates appeared rushed and fumbly as WA brought the heat, Wanganeen-Milera read the game well, moved like a Rolls Royce, made the correct decisions and showed off a couple of nice tricks under duress. He was crunched by WA star Jye Amiss in the final term when going back with the flight of the ball, and was forced to leave the field, but later returned to bravely run out the match. Perhaps one of the only South Australian’s whose draft stocks will have risen after his performance, Wanganeen-Milera appears likely to feature in first round calculations on draft night after a classy display.
~
#14 Jacob Owens (Glenelg)
Jacob Owens spent the game rotating from the half-forward flank to the wing. A ball-magnet for the Tigers in the SANFL Under-18 competition, Owens ran into some good spaces but lacked composure with his first couple of touches, throwing it on the boot and lofting it forwards instead of lowering his eyes. Appearing rushed at-times, Owens, like many of his teammates, struggled to adapt to the pace of the game at-times, despite finding a bit of the ball and working his way into some good spaces.
~
#17 Hugh Stagg (Glenelg)
Fresh off a four-goal performance against West Adelaide last weekend, Hugh Stagg spent the game at half-forward for South Australia. His kicking was poor early, contributing to a couple of turnovers, however he slotted the first goal of the game for SA after benefitting from a 50-metre penalty. The powerful flanker missed a shot on goal later in the game, and could have benefitted from a stint on the ball to gain some confidence.
~
#18 Arlo Draper (South Adelaide)
Top ten pick candidate Arlo Draper showed patches of class and was among South Australia’s best players at Lathlain Park. Draper split his time between the half-forward line and the midfield, as he has done all season. He was a marking target in attack and moved well in-traffic in the midfield. He was classy with his disposal by hand and foot and demonstrating some stoppage smarts to win a couple of clearances. In the final term, Draper expertly outbodied his opponent and took an easy mark before booting the first goal of the final quarter. He could have added a second with a set-shot after winning a high free-kick, then later passed off another gettable attempt to teammate Lukas Cooke in the pocket. He didn’t accumulate high numbers, but used it well and had an impact on the game.

SOUTH AUSTRALIA #20-35:
By: Michael Alvaro
~
#20 Matthew Roberts (South Adelaide)
It was a hit-and-miss kind of day for Roberts, who featured prominently in South Australia’s midfield. At his best, he found plenty of the ball and helped drag the Croweaters back into the game through sheer work-rate. The South Adelaide talent was particularly prolific in the second term and looked most productive in possession during said period, capping it off with a well hit 45m set shot goal. He made some good double efforts at ground level and was moved forward for longer stints in term four, but found himself rushed and a touch scratchy when disposing by foot at times.
~
#21 Jason Horne-Francis (South Adelaide)
There were plenty of eyes fixed of Horne-Francis, who skippered the South Australian side in his typical midfield-forward role. He didn’t quite have the impact he would have liked on-ball and just couldn’t get his hands on it, but showed some of his power with lunging pressure acts. His pure class in possession shone through though, as he used the ball well on the move and hardly looked rushed. One of his best kicks was a spearing ball across the top of the 50, hitting Hugh Stagg to prove his short game can be as effective as his long-range penetration. Horne-Francis ended up spending plenty of time forward in term four, converting a free kick and unselfishly handing off to Zac Becker for an assist.
~
#22 Mani Liddy (Sturt)
Another of the South Australian leaders and one of his side’s most prominent ball winners, Liddy proved an important four-quarter performer. The Sturt top-ager was typically strong around the ball, tackling hard and looking to bustle through congestion to release his outside runners. Liddy sometimes hacked his clearances forward but got good distance, and even found a bit of green ball around the ground through sheer work-rate. He put in a massive shift during the first half when WA was well on top, standing up in tough circumstances.
~
#23 Cooper Beecken (Glenelg)
Stationed among an under-siege defence, Beecken did a little bit of everything in an overall promising performance. The Glenelg backman was forced to play above his size in competing against the likes of Jack Williams at times, but fared well when running off his opponent on the rebound. Beecken timed his forward forays well to get on the end of handballs and deliver by foot, showing crisp skills and making good choices with his trust left boot.
~
#25 Max Litster (Woodville-West Torrens)
Another member of the backline who contributed aerially and across the ground, Litster proved his value as one of SA’s 2002-born prospects. The Woodville-West Torrens product has gained great experience at SANFL Reserves level this season and transferred his reliability to this outing. Litster made double efforts at the ball and wasn’t afraid to get in a contest, rising for spoils and chasing up ground balls. He was arguably among his side’s best handful of players overall, especially given he had plenty of work to do.
~
#27 Morgan Ferres (Sturt)
Ferres just about played a lone hand as SA’s most feasible forward target, presenting up the ground to good effect in what was a terrific first half performance. The Sturt tall worked his direct opponent over time and time again, easily getting separation on the lead and cleanly sticking his marks beyond the forward arc. Ferres was an important link for the Croweaters, but they could probably have done with another of him to make things happen inside 50. He wasn’t quite able to hit the scoreboard, and was moved to defence in term four.
~
#31 Lukas Cooke (Woodville-West Torrens)
Part of South Australia’s front six, Cooke usually does his best work as a marking option inside 50 but was made to work a little further afield on this occasion. The Woodville-West Torrens tall had a couple of difficult opportunities to kick goals in the first and fourth terms, but put one set shot out on the full while the other shaved the post. He had some nice moments in between when the going was tough, using his reach in the air and presenting on the lead.
~
#32 Zac Becker (Sturt)
Plenty of play went through Becker in defence, as he took on the task of manning Jye Amiss and mopped up plenty across defensive 50. He was tasked with the early kick-ins and went for distance with his massive boot, though saw plenty balls come straight back his way. Defensively, he got in good positions to make contests and intercept, including a couple of important marks and spoils. He was eventually shifted forward in term four and snared a goal for his efforts.
~
#33 Oscar Adams (Glenelg)
The tallest timber in South Australia’s starting back six, Adams had to be on his game against WA’s range of key forward options. The 198cm Glenelg prospect stood up strongly, attacking aerial contests and doing well to follow up once the ball had spilt off hands. He didn’t look to do too much with ball in hand, often taking the first and most effective option as SA shifted onto the rebound, using the ball cleanly for a player of his size.
~
#34 Jordan Lukac (Woodville-West Torrens)
Lukac’s physicality suited the intensity of the game, as the Woodville-West Torrens bigman looked to crash and bash his way into the contest. He played his usual ruck/forward role, rotating between both posts and faring well in the air. While he had a little more trouble gathering cleanly at ground level, Lukac worked hard for his side and added some strength around the ball.
~
#35 Oscar Steene (West Adelaide)
South Australia’s starting ruck, Steene showed promising potential as a 199cm prospect, but is still a touch raw. While he arrived at plenty of contests and got hands to the ball at most of them with his pure height and reach, Steene was made to battle hard to compete physically in the ruck and marking departments. Still, the West Adelaide tall has an aerial game he can build on.
Featured Image: Player’s fly in Saturday’s AFL U19 National Championships clash between WA and SA | Credit: SANFL via Twitter
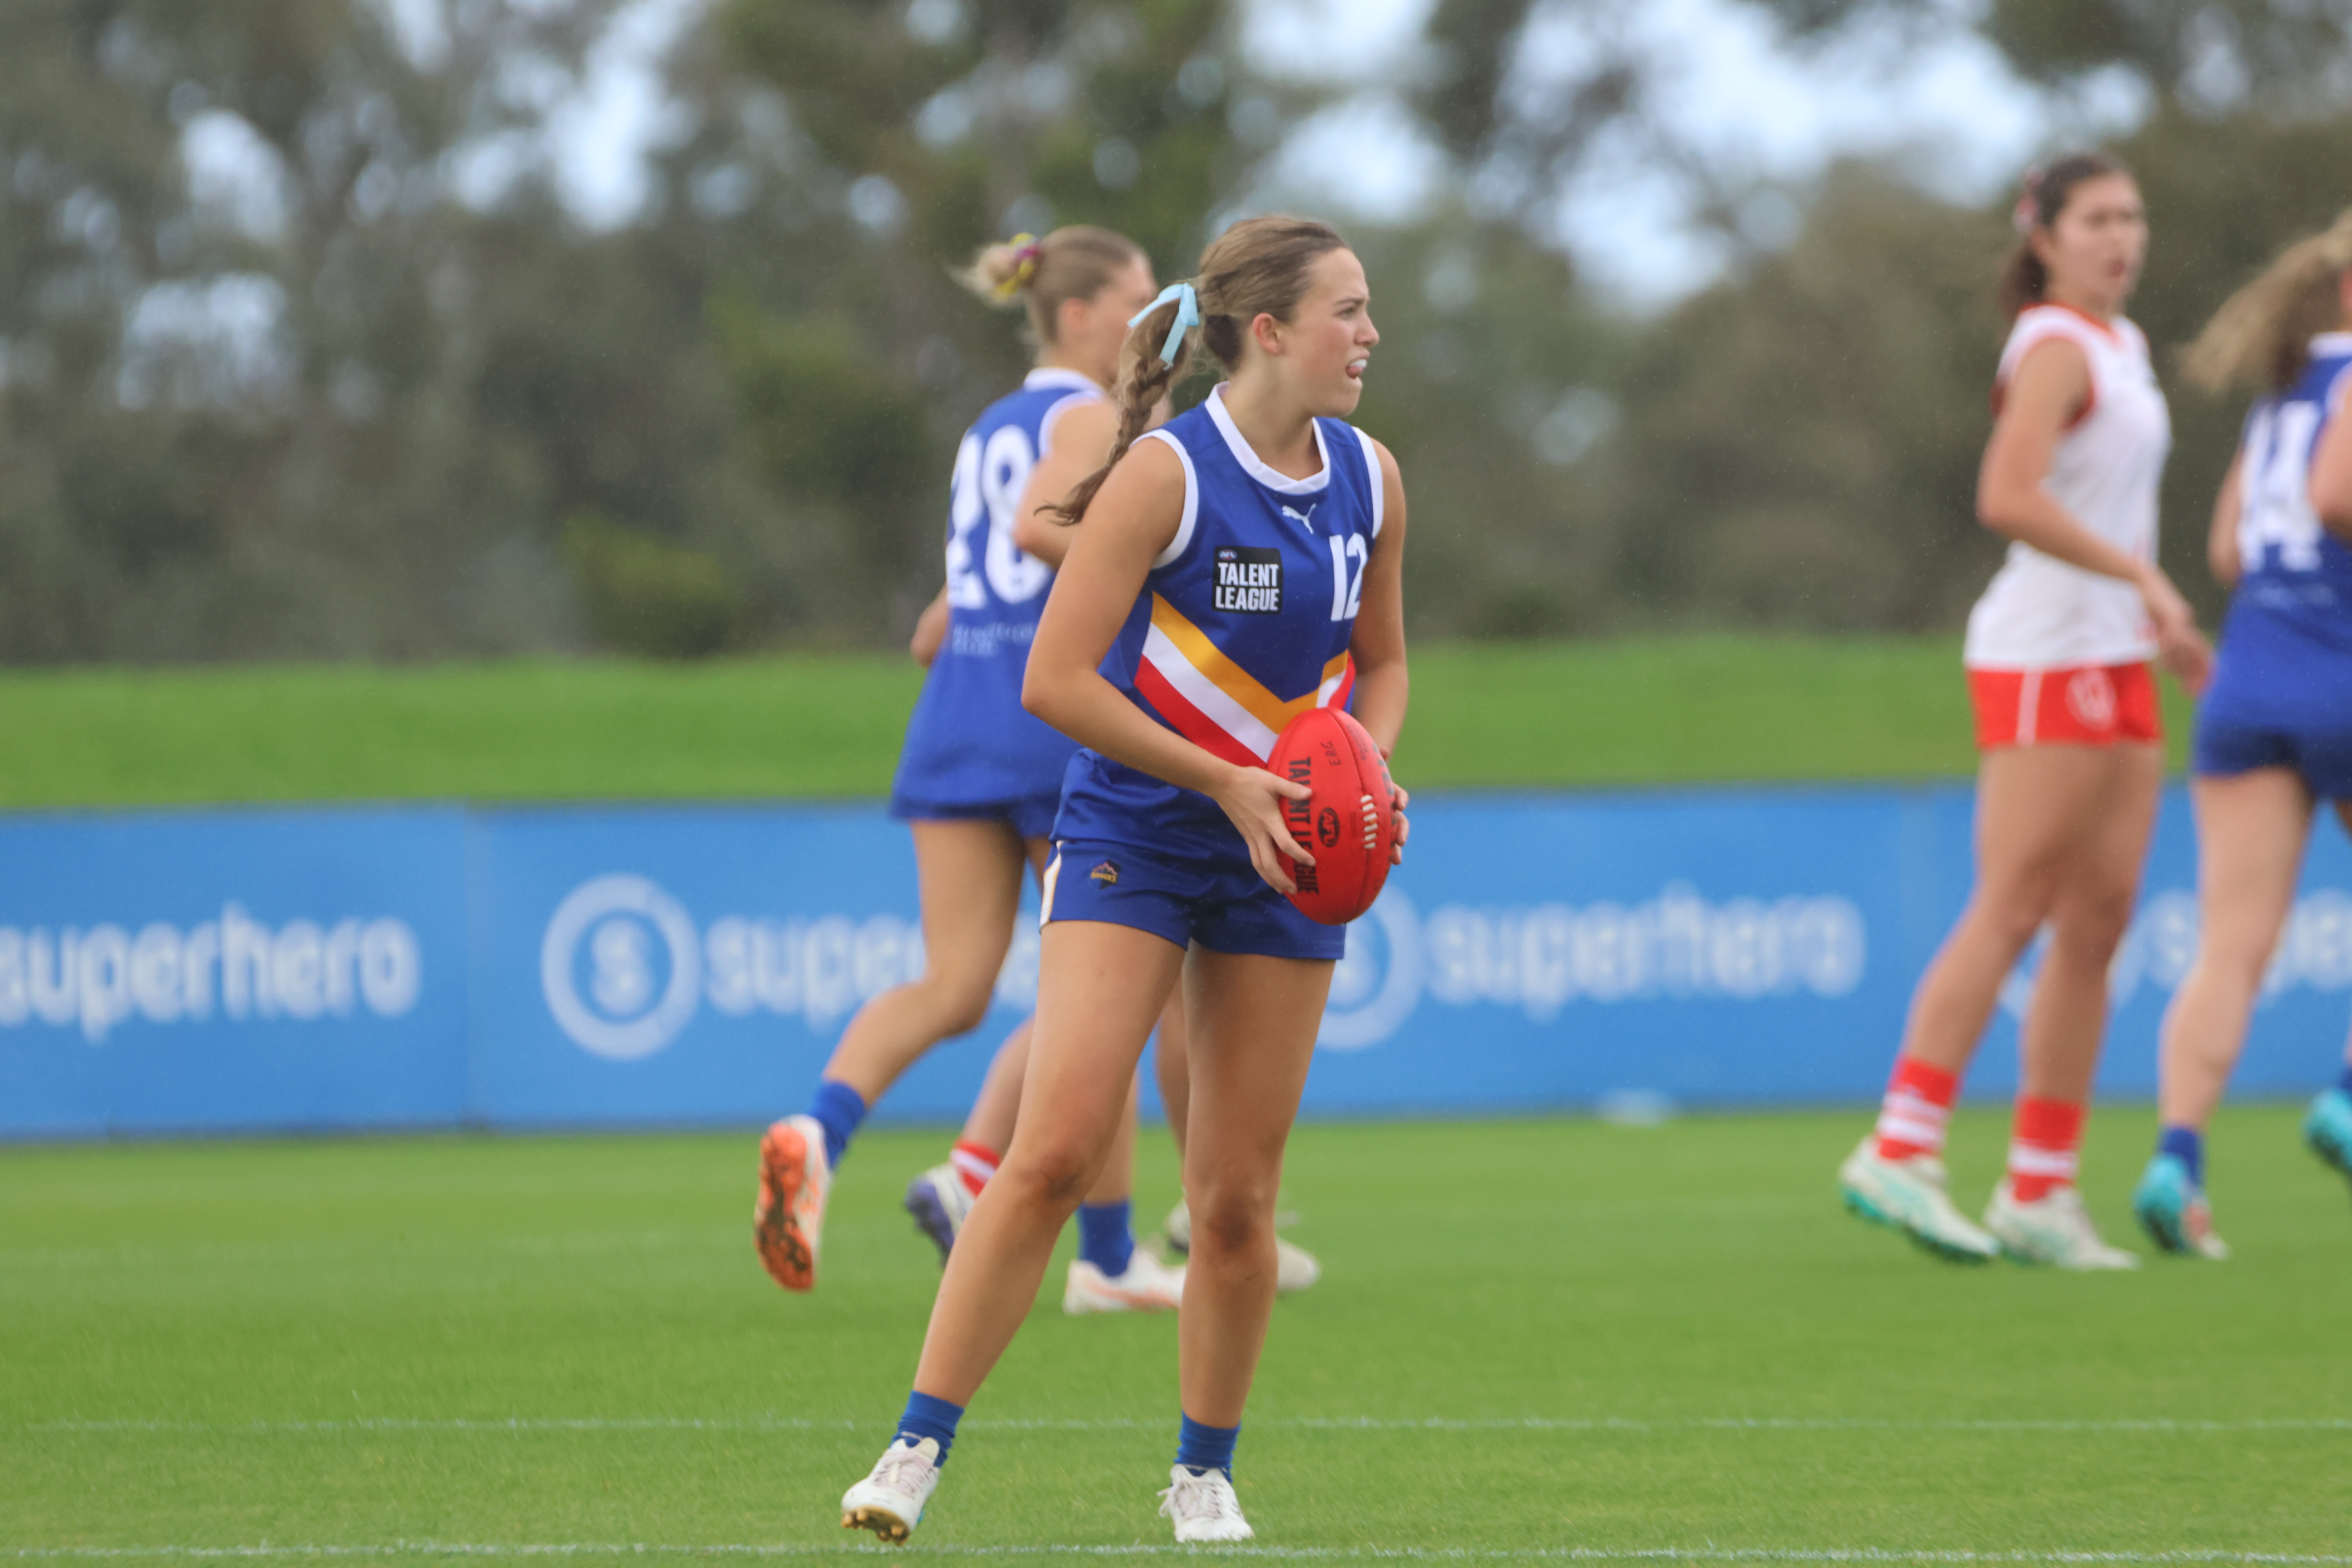
2026 Talent League Girls R17 notes: Tasmania Devils vs. Calder Cannons
TASMANIA Devils secured the all-important 12-point win over Calder Cannons down on the Apple Isle with some key AFLW Draft prospects putting in huge shifts. We took note of some of the players who caught the eye in the 5.9 (39) to 3.9 (27) result with not much between the two sides. All notes are […]
Player Focus: State stars light up League level
IT IS the time of year where an influx of junior talent begins filtering into the senior grades, and that is no exception in Western Australia. A year after elder brother Charlie did so, Harper Banfield made his League debut for West Coast on Saturday, where he is father-son eligible via father Drew‘s 265 AFL […]
State Academy notes: 2026 SANFLW – Round 12
ROUND 12 of the 2026 SANFL Women’s season produced another absorbing weekend of action, with the State Academy contingent continuing to press their cases. We took note of how each of the Academy members performed across the four games. All notes are the opinion of the individual author.

Player Focus: Eagles-tied prospects clash in Colts
WEST Coast fans and recruiters alike would have had their eyes glued to the WAFL Colts clash between Claremont and East Perth on Saturday. Club aligned prospects Noah Braun (father-son) and Garrison Kenh (Next Generation Academy) lined up for their respective sides, both topping the disposal charts. Braun, the son of 2006 premiership Eagle Michael, […]
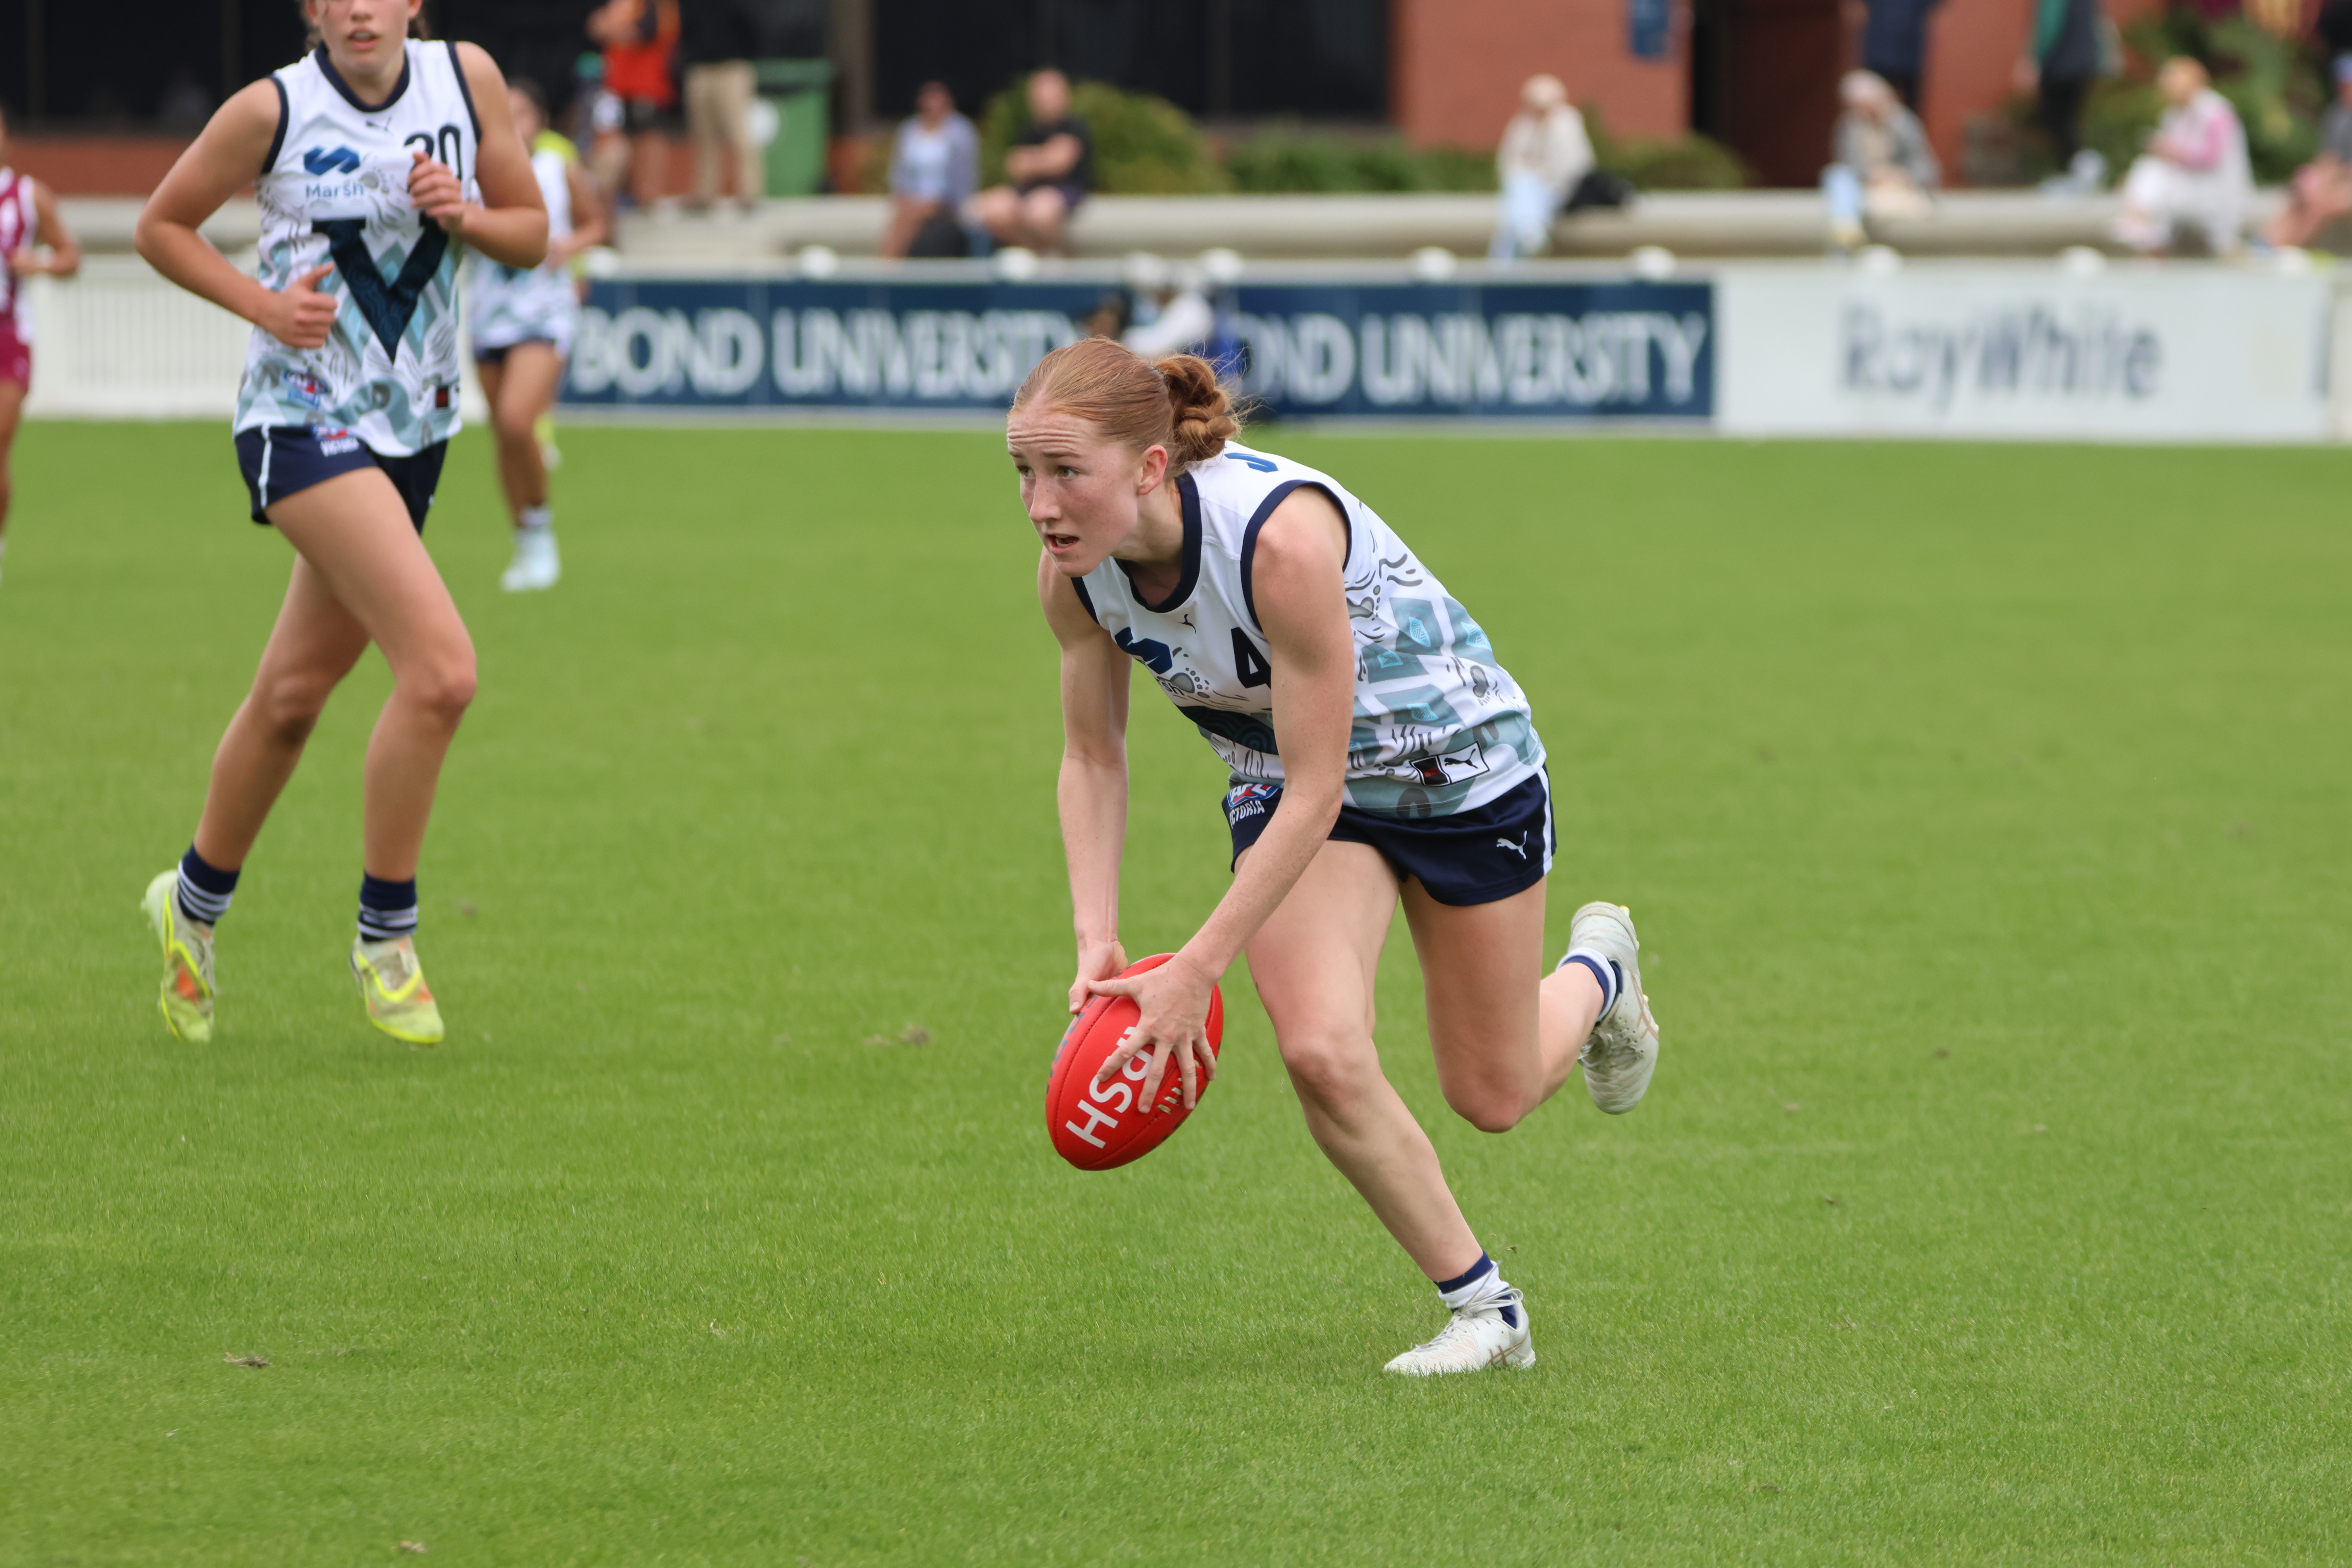
2026 TLG Player Focus: Evie Ward (Tasmania Devils)
TASMANIA Devils captain and National Academy member Evie Ward delivered a commanding performance in Round 17 of the Talent League Girls competition against the Calder Cannons. The versatile top-ager, who has established herself as a genuine utility capable of impacting on any line, spent the majority of the game driving her side out of the […]
2026 Talent League Girls R17 notes: Bendigo Pioneers vs. Eastern Ranges
DESPITE conceding the first goal and trailing at quarter time, the Eastern Ranges’ class shone through at Queen Elizabeth Oval, booting 12 goals to nil after the first break to defeat Bendigo Pioneers by 66 points in Round 17 of the Talent League Girls competition. We took note of some of the players who caught […]
2026 Talent League Girls R17 notes: Murray Bushrangers vs. Northern Knights
BOASTING a host of Vic Country and Allies representatives, Murray Bushrangers got back on the winner’s list with a strong 26-point win over Northern Knights. In what was ultimately a tight clash in Seymour, the Bushrangers booted three goals to nil in the third term to really create some breathing room and run out 9.8 […]
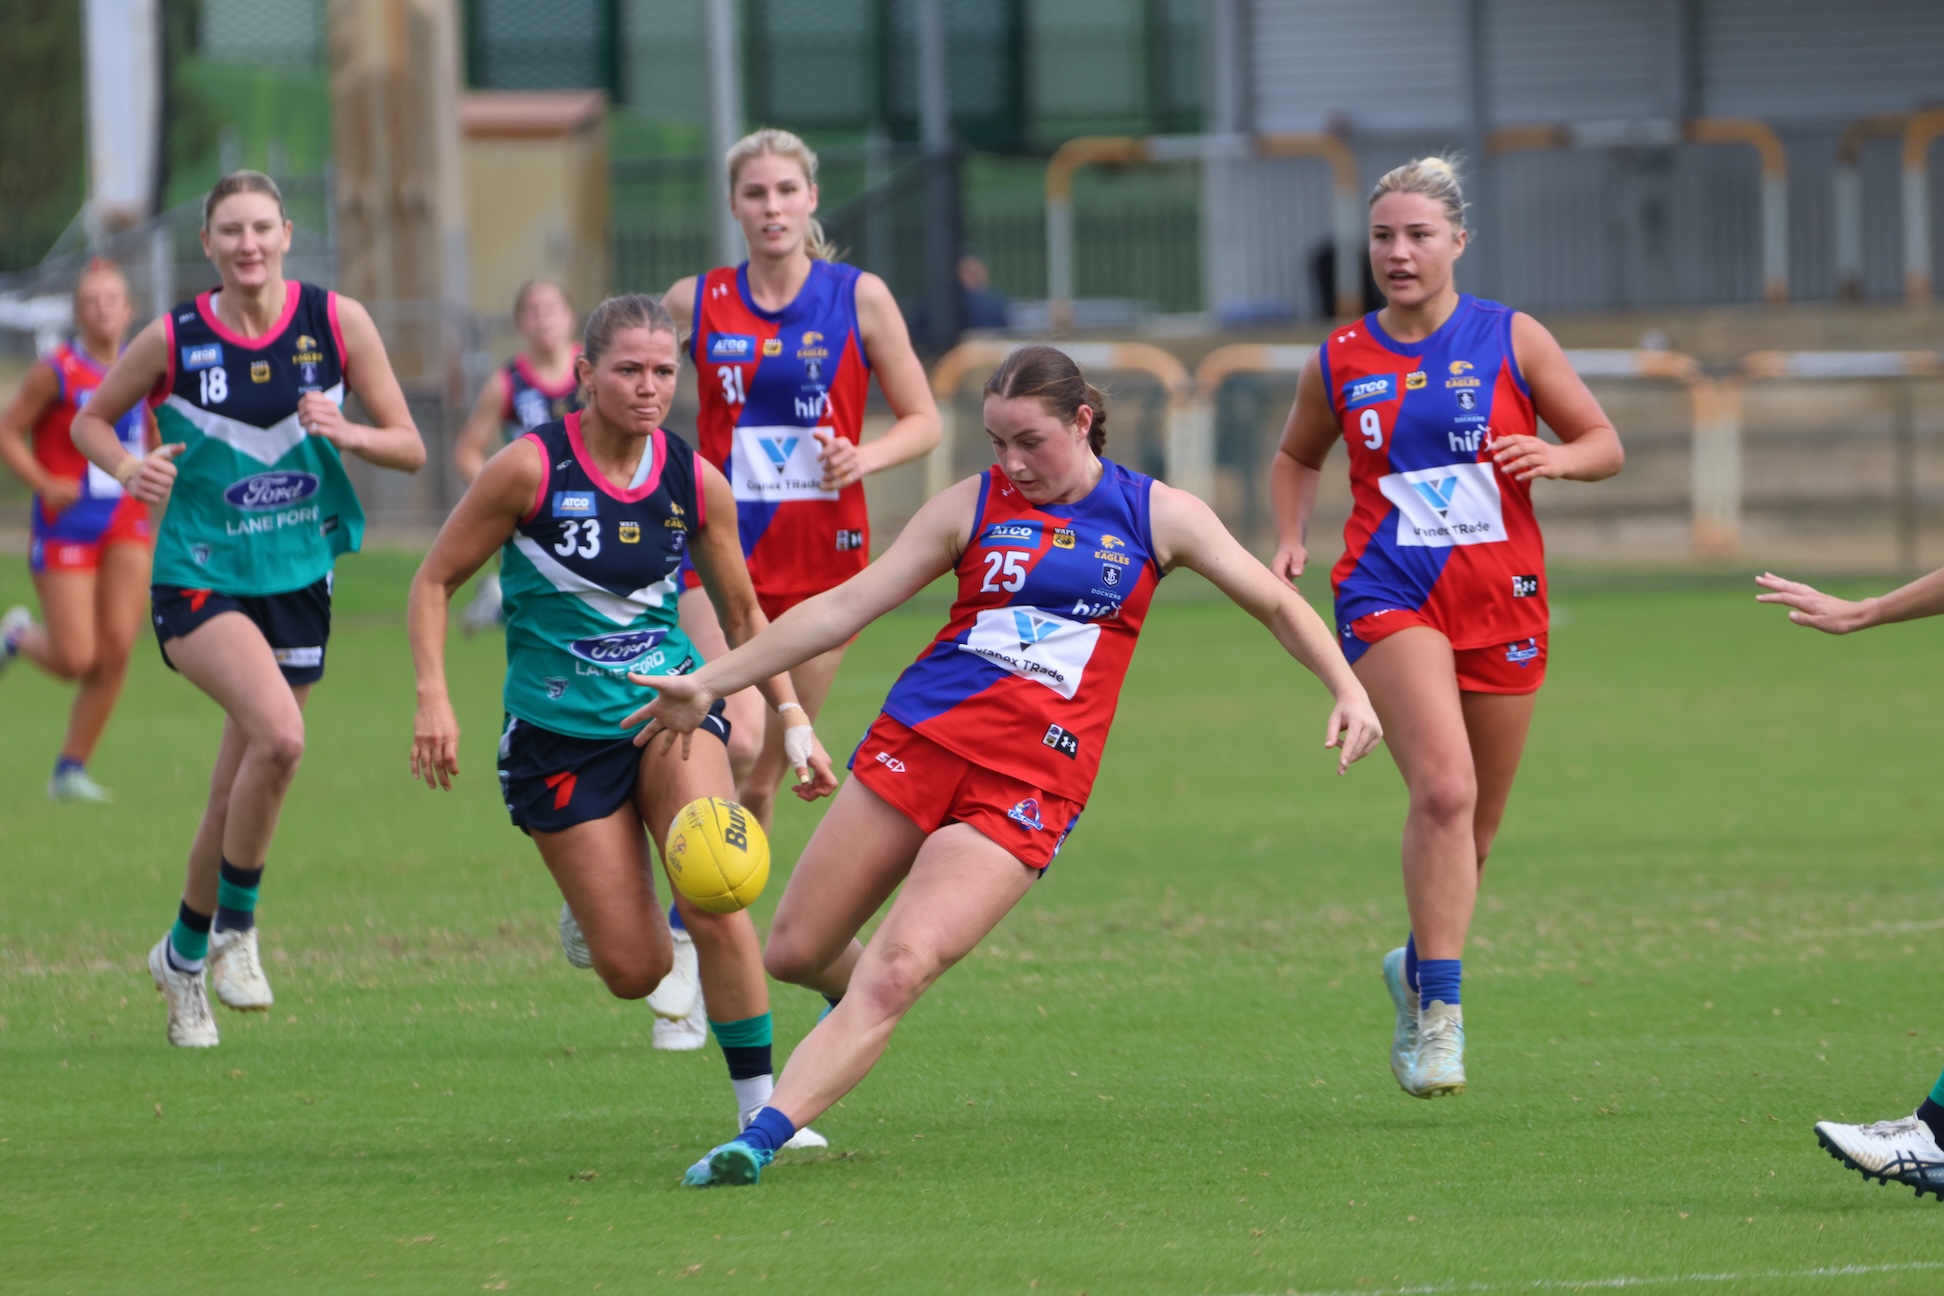
2026 State Academy notes: WAFLW – Round 17
ROUND 17 of the WAFL Women’s season produced some eye-catching individual performances as the competition heads towards its business end. We took note of how the West Australian Summer Squad members fared across each game. All notes are the opinion of the individual author.
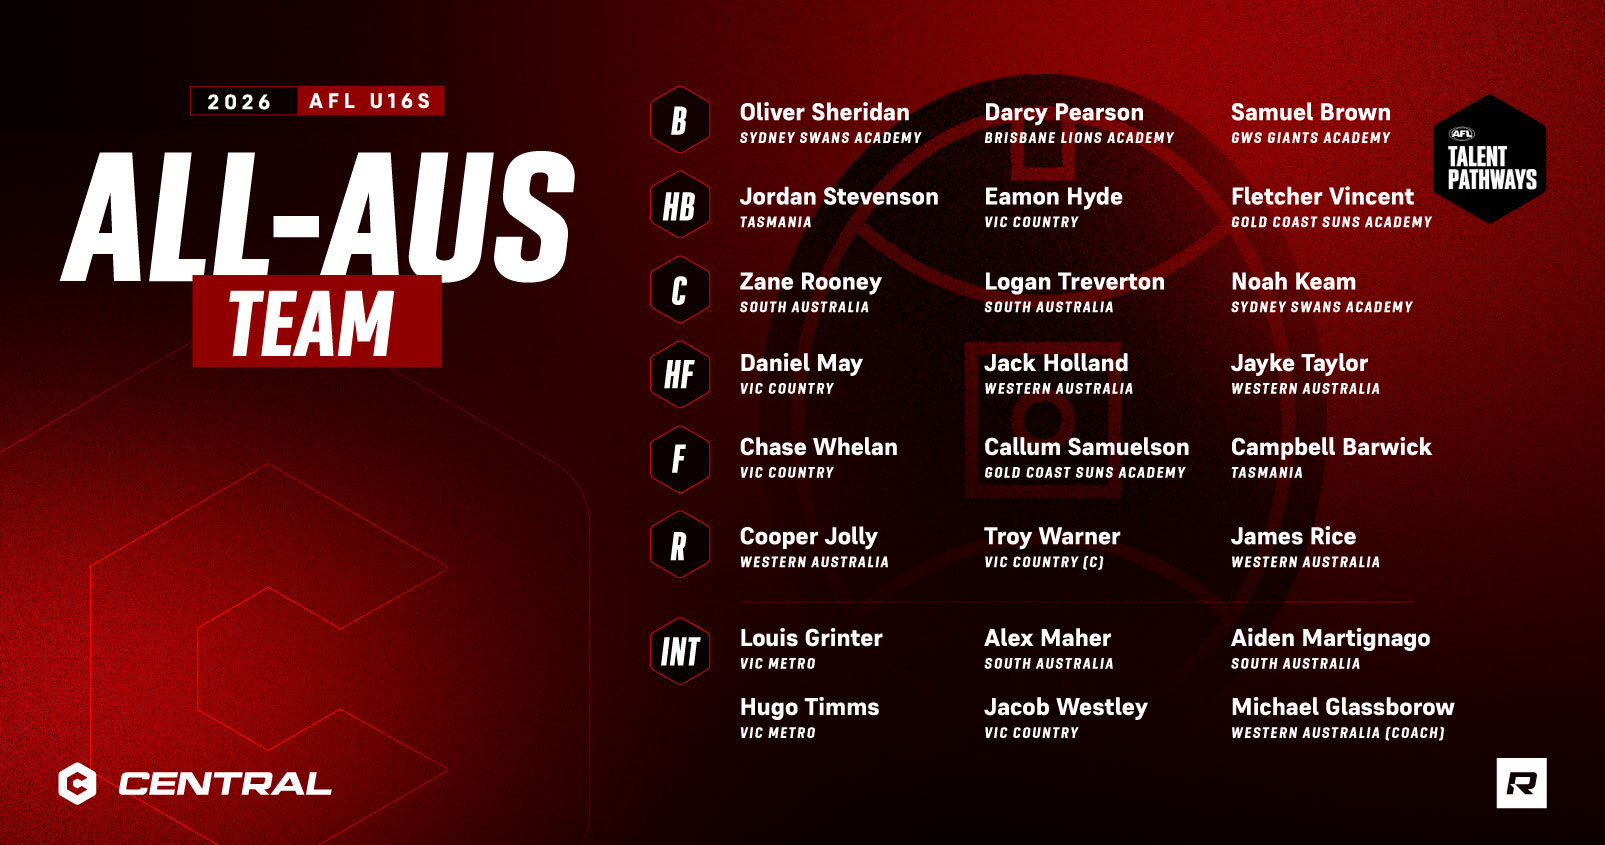
Warner captains Under 16 All-Australian team
WEST Australian co-captain and Kevin Sheehan Medallist Troy Warner has been named captain of the Under 16 All-Australian team. Alan McLean Medallist James Rice also features in the 23-player lineup, next to Warner and South Australian MVP Logan Treverton in midfield. >> RECAP: 2026 AFL Under 16 National Championships Warner was one of four West […]

Id love to know how Will Pearce is not on this list considering the lad finsihed first in the goal kicking for the league and second for Marking for this age group his mental toughness is second to none and is versatile through the midfield as well as being accurate up forward in front of goals it’s sad to see a young lad not get recognised when his stats speak for themselves