2020 AFL Draft recap: St Kilda Saints
ST KILDA is a side looking to crack the top four and after climbing all the way to sixth at the end of this year’s home-and-away fixtures, the Saints are truly ascending. Having recently targeted established, mature-age talent to accelerate their development, St Kilda has hardly been the most active club come draft time over the last few years. That theme continued in 2020, but handy key position depth at either end sees the Saints’ squad filling out quite nicely in anticipation of a top four tilt.
ST KILDA
National Draft:
#26 Matthew Allison (Calder Cannons/Vic Metro)
#45 Tom Highmore (South Adelaide/South Australia)
Rookies:
Nil.
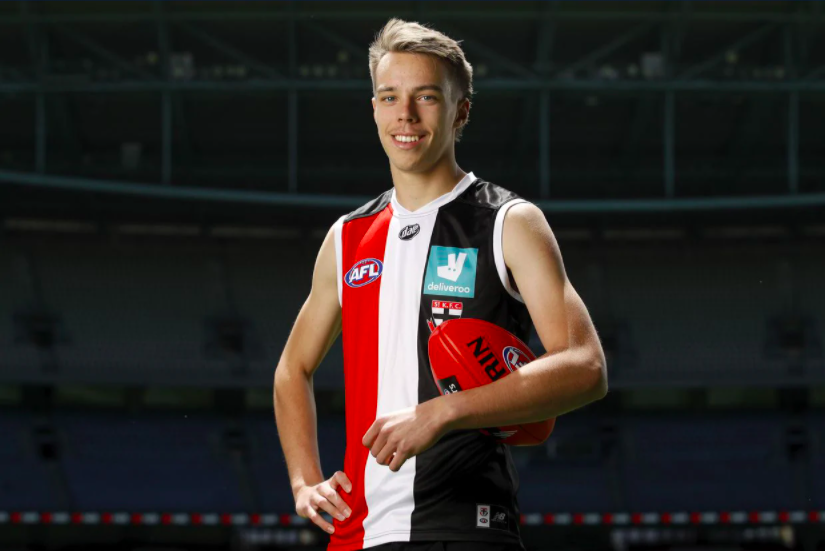
St Kilda entered this year’s National Draft at the end of round one, selecting Calder Cannons graduate Matthew Allison with Pick 26. The 194cm utility is somewhat of a prospective selection having only shown glimpses of top-end potential across his 10 NAB League outings as a bottom-ager. But some strong marking displays during the 2020 preseason put Allison’s name on the map, pegging him as a potential bolter after earning a National Draft Combine invite. He blends aerial prowess with strong running capacity and looks like developing into a key forward, but can also roll further afield onto the wing.
Tom Highmore was the only other new Saint selected across both the National and Rookie drafts, making for a shrewd choice at Pick 45. The 22-year-old defender was overlooked as a GWS Academy product in his draft year, but has since put plenty of runs on the board in the senior NEAFL and SANFL competitions. His move to South Adelaide this year proved fruitful, as the 192cm interceptor quickly established himself as a premier player in the league. He is a strong marker who proves just as capable with ball in hand and promises to add great long-term depth to St Kilda’s backline. He should push for selection in 2021 and is a pick which suits St Kilda’s upward trend.
VIDEO RECAP:
—
Featured Image: Saints draftee Matthew Allison dons his new colours | Credit: Dylan Burns/AFL Photos
PROFILED | 2026 AFL Mid-Season draftees
THE 2026 AFL Mid-Season Rookie Draft has come and gone, with 18 of a possible 19 selections made in Tuesday night’s intake. West Australian native Jaxon Artemis was taken with pick one to Essendon, making up a cohort of 17 players who have not previously had an AFL opportunity. On the other side of the […]

2026 AFL Mid-Season Draft: Key info, draft order & top prospects
THE 2026 AFL Mid-Season Rookie Draft is set to take place on Tuesday night, with Essendon holding the keys to pick one. With 12 clubs taking up the option to open up list spots, the final draft order has been locked in with a maximum of 19 selections to be made. Collingwood, Melbourne, and Port […]
AFL confirms Tasmania’s list establishment rules
A FIVE million dollar Signing Bonus, a dozen of the most talented 17-year-old prospects, up to 50 total players on the list and access to any Tasmanian-born or raised prospects, are the son of a Tasmanian born 100-gamer and seven of the first 14 picks in the 2027 AFL Draft were among the concessions confirmed […]

Recruitment drive: Devils enter VFL venture
OFF-SEASONS can often be the catalyst for in-season success, and several state league clubs will hope that is the case in 2026. In a new series on Rookie Me Central, we highlight some of the most exciting recruitment drives from around the country. Next up is the newly formed Tasmania Devils VFL side. >> RECRUITMENT DRIVE: […]
Recruitment drive: Fresh Saints faces forge new path
ST KILDA will lay claim to its own reserves side for the first time since 1999 this year. After ceasing their alignment with Sandringham Zebras, who have also driven a strong recruiting campaign, the Saints have built their new VFL list with a focus on youth development and establishing culture. >> RECRUITMENT DRIVE: Sandringham | […]
AFL Draft | The two clubs set to shape 2026/27
ESSENDON and Port Adelaide will be linked over the next two drafts in more ways than one. While not traditional rivals, they face a fight for draft picks and prospects with some of their respective club-tied talents shaping up as quite high-end in 2026 and 2027. >> EVERY CLUB: The top club-tied prospects for 2026 […]
National Academy prospects hit the track with AFL clubs
THE 2026 National Academy members are set to be unleashed unto AFL clubs in the coming weeks, as preseason training ramps up. Some have already spent time at their designated clubs in the new year, with several prospects also being aligned via academies and father-son eligibility. >> PROFILED: 2026 AFL National Academy squad An early […]
Inaugural Tasmania Devils VFL squad revealed
TASMANIA Devils’ inaugural VFL squad has been announced, featuring 48 players keen to don the iconic bottle green guernsey next year. The headline signings include several former AFL-listed players, along with a host of young local talent from both local reaches and interstate. >> SCROLL to see the full squad Ex-Sydney trio Robbie Fox, Caleb […]
AFL DRAFT | The clubs stockpiling future picks
THE future picks market is becoming increasingly prevalent at each AFL Draft, and with tighter rules around matching bids, preparation is proving key. Gold Coast has become the pick swap king and frantically did so throughout trade and draft period to secure five academy graduates this year. >> EVERY CLUB: 2026-2028 future picks>> AFL DRAFT: […]
