Scouting Notes: 2025 Coates Talent League – Round 7

BARRING a single outlier, the weekend’s seven Coates Talent League fixtures were tightly contested and allowed a bunch of prospects to stake their names as game-winners. Round 7 also provided one final glimpse of the Northern Academies, with many Allied prospects finishing their campaigns on a high note.
>> CTL ROUND 7: Snapshot | Player of the Week | Team of the Week | RMC Medal
- Team
Gippsland Power


Sandringham Dragons

Gippsland Power 11.17 (83) def. Sandringham Dragons 10.7 (67)
By: Michael Alvaro
GIPPSLAND POWER:
#7 Willem Duursma
Midfielder | 191cm | 21/06/2007
Stats: 31 disposals, 7 clearances, 1 goal
Duursma continues to build on his midfield acumen and got going immediately with some smooth work around the ball. His agility and clean hands made navigating stoppages a breeze, keeping things neat and tidy when distributing the ball. He can continue to improve his ability to absorb or apply body contact, and was a little scrappy by foot, but is held to a high standard due to his high reputation. He dominated the centre stoppages with four clearances at the restarts and snapped a goal for the lead in term four, also lifting with a terrific intercept mark coming in as the third man up at centre half-forward. The quality is there and he is building nicely into representative season.
#10 Cody Templeton
Midfielder | 179cm | 01/01/2008
Stats: 19 disposals, 10 tackles, 5 inside 50s
There are a few others like him in this current side, but Templeton seems like the quintessential Gippsland footballer with his crash and bash style. The energetic bottom-ager looked difficult to play against with his refusal to be tackled and hard-at-it approach, impacting the game going both ways. His kicking was sometimes scrappy but he provided plenty of dash and got into dangerous areas to deliver the ball inside 50. He’ll be great to watch over the next 12-18 months.
#16 Jobe Scapin
Forward | 187cm | 01/05/2007
Stats: 14 disposals, 5 marks, 4 goals
Scapin broke out with a bag of four goals on Saturday, slotting all of them from set shots. He provided some strong work early with a bump and holding the ball tackle which resulted in his first major. Scapin’s tackle pressure and speed were assets inside 50, as was his overhead marking ability. He used the latter attribute to work further afield in the final quarter, proving a viable connection piece having completed his scoring in terms one to three.
#24 Brodie Atkins
Midfielder/Forward | 181cm | 25/01/2007
Stats: 22 disposals, 3 tackles, 4 inside 50s
Seemingly enjoying a robust battle with Sandringham bull Xavier Bamert, Atkins showed he was in the hunt early. His tackle numbers were down on his usual output but he applied strong pressure and was sure to punish opponents by bringing them to ground. Atkins also showed improvement in the way of poise by foot having sometimes been prone to blazing away out of congestion. Repeat efforts and high work rate are staples of his game which hardly wavered once again.
#26 Mitchell Stevens | Adelaide F/S
Midfielder/Defender | 185cm | 15/08/2007
Stats: 17 disposals, 8 tackles, 3 clearances
Stevens featured on both sides of midfield before shifting to defence, showing a range of traits between the various roles. His competitiveness was evident around the ball with eight tackles and some clean extraction work at stoppages. He then shifted tact to be a key distributor by foot out of the backline, also making good reads to intercept and rebound high up the ground.
#40 Xavier Ladbrook
Key Defender/Forward | 200cm | 16/10/2008
Stats: 12 disposals, 6 marks, 2 goals
Ladbrook is shaping as a similar junior to Essendon’s Nik Cox, with the versatile 200cm bottom-ager capable of playing on a wing or in key positions. He was used at either end of the ground this time out with roaring success up forward. His final quarter was highly promising, taking five marks and booting his second goal to finish with a bang. Ladbrook’s aerial range and athleticism will continue to be difficult to handle wherever he plays, making him a real weapon.
SANDRINGHAM DRAGONS:
#5 Ricky Theodoropoulos
Small Forward | 170cm | 05/04/2007
Stats: 16 disposals, 4 inside 50s, 1 goal
A tricky customer up forward, Theodoropoulos started brightly with seven of his 16 touches coming in the opening quarter. He emptied out the attacking 50 to find the ball further afield and use it dangerously heading forward. In those instances, his darting steps created space and allowed him to pull off more expansive passes by foot. While size was a factor in limiting his effectiveness at times, Theodoropoulos booted an sensational set shot goal from 55 metres out in term three.
#27 Xavier Bamert
Midfielder/Forward | 186cm | 29/01/2007
Stats: 16 disposals, 10 tackles, 4 clearances
It was a typically solid outing from Bamert, who seemed to thrive off a tough and physical battle with fellow hard nut Brodie Atkins in midfield. His strong frame allowed him to get stuck in at stoppages and stand in tackles or apply them himself, though he arguably had a greater impact up forward. There, Bamert charged out on the lead and was brave in when competing aerially, adding another string to his bow as the National Championships approach.
#37 Charlie Rozenes
Midfielder | 178cm | 09/08/2006
Stats: 16 disposals, 8 clearances, 2 goals
Rozenes was arguably Sandringham’s best throughout the four quarters, providing his usual energy and run from midfield. He bagged consecutive goals in the opening term, the first being a classy snap from the pocket. Going one better with the next effort, Rozenes stepped an opponent and blasted the ball home at full tilt. He often backed his speed and while that same finishing touch wore off as the game progressed, the over-ager continued to drive forward with intent.
- Team
Eastern Ranges
Swans Academy
Eastern Ranges 8.9 (57) def. Swans Academy 8.6 (54)
By: Declan Reeve
EASTERN RANGES:
#1 Blake Chambers
Wing | 182cm | 31/05/2007
Stats: 25 disposals, 7 marks, 4 rebound 50s
Stationed on the wing all game, Chambers got into good spots around the contest to be an easy release option for his teammates. With ball in hand, he demonstrated his vision and class by foot to quickly find options and execute the kick, but was equally dangerous when released into space heading forward. Chambers, like many teammates, was useful when his side was trying to slow down play in the defensive half to take uncontested marks and find small territory-gaining options before building into quicker ball movement in the front half.
#8 Lachy Dovaston
Small Forward | 177cm | 29/05/2007
Stats: 16 disposals, 5 tackles, 2 goals
Ever consistent, the rising small registered his third 16-disposal game of the season, with clean pick-ups at speed a consistent sight when he was around the contest. Dovaston used his pace as he always does to bring energy to contest, looking to break free of opponents and kick forward to the advantage of teammates, even if he did ask a bit much of them at times. With the conditions of the game leading to a scrappier affair, Dovaston did his bit to apply pressure and force errors from opponents in the front half.
#22 Xavier Taylor
Tall Defender | 191cm | 30/01/2007
Stats: 24 disposals, 12 marks, 5 tackles
Taylor lead the way with 12 marks for the game, with a mix of strong contested intercept grabs and easy uncontested marks from teammates looking for a safe disposal option in the defensive half. As he typically is, Taylor was defensively sound as he worked hard to get a hand in to opposition marking attempts, or harassed anyone in possession in the defensive half. Taylor chose the safe option more often than not, happy to gain small amounts of territory around the ground whilst ensuring his side remained in possession.
#31 Andrew Barker
Tall Defender | 191cm | 18/06/2007
Stats: 20 disposals, 6 marks, 1 goal
Another reliable defender for the Ranges, Barker, similarly to Taylor, was competitive around every contest and worked hard to impact in anyway he could. Barker was a strong interceptor for his side, holding a couple of contested marks and looking to use the ball safely with small territory gaining kicks forward, but was comfortable going long when a loose option was present. Barker also slotted the first goal of the game as he streamed through the middle, got a releasing handball and launched from just outside of the 50.
SWANS ACADEMY:
#8 Joe Harrison
Midfielder | 183cm | 20/07/2006
Stats: 31 disposals, 11 clearances, 10 inside 50s
The over-age midfielder stuffed the stats sheet through pure competitiveness and work rate, with the weather conditions suiting a player with his traits. Harrison regularly burst from packs and stoppages with ball in hand, more often than not blasting a long kick forward. Harrison ran hard both ways, putting in a game high nine tackles as he controlled the contest.
#10 Lachlan Carmichael
Defender | 185cm | 27/08/2007
Stats: 19 disposals, 6 tackles, 7 rebound 50s
As is standard for the AFL Academy member, Carmichael was used his his side’s main distributor out of the back half, utilising his piercing right foot to find dangerous options when exiting the defensive zone. Carmichael pushed up the ground to be a threat when his side was looking to breach into the forward half as well, looking to get involved as a releasing handball option to keep his side moving forward fluently.
#20 Guy Jenkin
Wing/Forward | 177cm | 25/11/2008
Stats: 17 disposals, 5 marks, 2 goals
The bottom-aged small held his space and controlled his wing really well throughout the game, being used a few times as a switch option for his side and demonstrating his speed and endurance mix. Jenkin remained efficient with his ball use on both sides of the body, able to hit any option that presented in his vision regardless of the angle. Utilising his running capacity, Jenkin outran opposition regularly, able to impact the scoreboard with repeated running efforts once he disposed of the footy.
#30 Noah Chamberlain
Wing | 194cm | 21/03/2007
Stats: 16 disposals, 6 marks, 2 tackles
The Swans’ second AFL Academy representative, Chamberlain worked well to control his wing and hold space as his side would often look to exit defensive 50 on his side of the ground, where he was a reliable marking target. Chamberlain’s kicking was typically on point as he looked to hit change of lane options, but still managed to put the ball to the advantage of his teammates when kicking down the line. Chamberlain pressured opposition well around the contest, putting in a few spoils and one percenters that don’t show on the stats sheet.
#33 Max King
Tall Forward | 192cm | 01/09/2007
Stats: 11 disposals, 3 marks, 2 behinds
The athletic forward lacked a bit of end product all game, with a few almost-marks and almost-kicks diminishing his impact on the contest. Despite this, King still demonstrated glimpses of what he could be once in a full-time AFL program as he held a few impressive contested grabs as an option down the line for teammates exiting the defensive half, and got high in the air a few more times without reeling in the mark.
- Team
Oakleigh Chargers

Lions Academy
Oakleigh Chargers 10.4 (64) def. Lions Academy 8.6 (54)
By: Adrian Dixon
OAKLEIGH CHARGERS:
#4 Jack Ison | Carlton NGA
Forward | 190cm | 26/03/2007
Stats: 13 disposals, 6 tackles, 1 goal
The smooth moving Ison provided strong tackle pressure and good kicking angles, especially on his left foot. He hit a perfect set shot kick from close range to make it three in a row for the Chargers in their dominant second quarter, and then later on he made a great rundown tackle that was turned into a Mingara Clark goal. Ison’s intercepting, especially when covering opposition 50 exits, was exceptional as he managed to position himself well for a few dangerous re-entries. The Carlton NGA prospect also showed great evasiveness and vision through traffic.
#9 Aaron Sharkie
Defender | 184cm | 20/01/2007
Stats: 22 disposals, 6 rebound 50s, 1 goal
Sharkie provided excellent ground coverage throughout the day and in the process provided plenty of run, especially from the backline and on the overlap. His long kicking was a feature where he constantly provided plenty of talk and direction to his teammates when it came to his distribution out of defence. A highlight of his game was when he snapped a goal early in the second quarter to get Oakleigh started. Sharkie was very composed under pressure and was quite quick to get boot to ball, while also providing excellent defensive pressure.
#15 Noah Yze | Melbourne F/S
Midfielder | 191cm | 12/04/2006
Stats: 19 disposals, 9 tackles, 1 goal
Usually accustomed to a role at either end of the ground, Yze played the duration of the game in the midfield. He kicked Oakleigh’s first for the day from a good ground ball and snap, then later ended up getting into a good spot unmanned to mark in the forward pocket, only for his set shot to thud into the post. Yze provided a strong presence in the midfield where he was able to use his bigger body to provide plenty of defensive pressure, highlighted by his high tackling numbers.
#64 Josh Shepherd
Tall Defender | 190cm | 14/12/2006
Stats: 19 disposals, 9 marks, 3 rebound 50s
Shepherd started off very well with a few good marks down back, especially on the intercept and overhead in the contest where Brisbane was dominant during the early proceedings. The over-ager didn’t get drawn into his man as he pushed up the ground to cause a crucial stoppage while the Lions had the run of play. He could be less hesitant with his ball use, but was more decisive when repeatedly pushing up the ground to come up with crucial spoils, especially late in the game when the result was in the balance.
LIONS ACADEMY:
#13 Cooper Hodge | Hawthorn F/S
Midfielder | 182cm | 26/07/2008
Stats: 15 disposals, 16 tackles, 3 clearances
The son of Hawthorn legend Luke was prolific throughout the day, especially around the contest, going in hard and making sure that his teammates were well supported in the midfield. In a game that was tight, Hodge was a constant presence at the coalface laying a massive 16 tackles. His work when it came to getting the ball at ground level was crucial, especially to release the likes of Harrison Bridge and Daniel Annable. Hodge’s set shot kicking could do with some improvement, however, missing a kick on the quarter time siren.
#15 Harrison Bridge
Defender/Midfielder | 182cm | 04/09/2007
Stats: 20 disposals, 8 tackles, 2 goals
Rotating between the midfield and the backline, Bridge played an excellent support act to Annable with his strong tackling pressure around the contest. Bridge kicked Brisbane’s second goal after setting up his own play coming off half-back, showing excellent running patterns to maintain his involvement and finishing off with a nice long left-foot goal. His penetrating delivery by foot caused issues for the opposition, and Bridge was a constant go-to player down back with his reliable disposal. His second goal, again from long-range, cut the margin back to a single kick early in the last quarter.
#23 Daniel Annable
Midfielder | 184cm | 05/04/2007
Stats: 30 disposals, 5 tackles, 6 inside 50s
Annable’s clearance work was exceptional throughout the day, especially when it came to his anticipation at the stoppages, reading his ruck’s work very well to blaze away from the contest. Annable provided plenty of run on the overlap, especially when he was involved in chains of play and while he was a constant go-to player in the middle of the ground. He was also very calm and measured when it came to his disposal, making sensible decisions considering the way the game was played. Annable’s balance between his inside and outside game was very good and showed excellent running patterns with a strong endurance base.
#40 Isaac Waller
Ruck/Key Forward | 203cm | 30/03/2007
Stats: 6 disposals, 21 hitouts, 2 goals
The big ruckman continues to develop his forward craft and has shown progress, taking a strong overhead mark on a lead in the first quarter and making the most of that opportunity to convert with a good left-foot set shot. Straight from that goal, he then went straight into the ruck where he managed to find Annable with a clean hitout to advantage, sending him on his way. He then showed great evasiveness to kick goal number two late in the first quarter, using his athleticism and agility from deep in the pocket. While Waller’s disposal count was minimal, he still managed to have an impact on the game with his ability to get around the ground and his ruck craft, winning several crucial hitouts with some powerful taps.
- Team
Bendigo Pioneers
GWV Rebels

Bendigo Pioneers 10.11 (71) def. GWV Rebels 10.8 (68)
By: Michael Alvaro
BENDIGO PIONEERS:
#1 Cody Walker | Carlton F/S & Richmond NGA
Midfielder/Forward | 184cm | 26/01/2008
Stats: 31 disposals, 10 marks, 3 goals
In one of the great bottom-age performances this competition has seen, Walker willed his side over the line on Sunday. He dominated each stat and was prominent all around the ground, gliding across it like his father Andrew was famous for. Walker’s consecutive final quarter goals not only put Bendigo into the lead from a long way back, but also showcased his class with finishes over the mark and from long-range on the run. His explosiveness out of the contest was impressive, always staying on his toes and looking to carve a path forward. A star in the making.
#2 Tom Evans
Defender | 180cm | 22/02/2006
Stats: 25 disposals, 17 kicks, 4 rebound 50s
Evans again had no trouble racking up possessions in the back half, reprising his role as Bendigo’s designated ball user. The over-ager willingly took ground and backed his foot skills with aggressive options, even if a few didn’t come off. Evans also applied himself defensively, albeit with some physical hurdles, and backed into a nice intercept mark in the hole during the fourth quarter.
#9 Hunter Wright
Midfielder/Forward | 188cm | 20/10/2007
Stats: 23 disposals, 4 marks, 1 goal
While Walker took control of the midfield battle, Wright made his presence felt in the front half. He worked into dangerous spots to launch the ball inside 50, utilising his punchy left-foot kicking to bring class to Bendigo’s attacks. Wright reacted well to his teammates’ forward 50 entries and used his strong frame to hold position, taking the ball cleanly as a marking option. The top-ager’s size and handling were also useful on-ball as he looked to power out of congestion.
GWV REBELS:
#9 Talor Byrne
Midfielder | 174cm | 14/11/2007
Stats: 26 disposals, 8 clearances, 2 goals
Arguably the best-performed player for the losing side, Byrne was full of energy on Sunday. The diminutive midfielder showcased ample core strength and speed to burst out of stoppages, driving his legs and proving difficult to contain on the move. He could hardly be faulted for effort at the contest and was also a threat going forward, booting two goals after half time. His second major was a terrific finish on the run to add some late hope for the Rebels – ultimately to no avail.
#22 Charlie McKinnon
Tall Forward | 190cm | 25/10/2007
Stats: 8 disposals, 5 marks, 4 goals
After booting a couple of goals on his injury return last time out, McKinnon doubled that tally with a game-high four on Sunday. He was typically dangerous when situated one-out deep inside 50, getting the better of a genuine key position opponent in marking duels. His read of the ball, bodywork, and strong hands allowed for several shots at the big sticks, and he could have ended up with more than a handful of majors on another day. He seems to know his game well.
#23 Flynn Penry
Ruck | 201cm | 20/04/2006
Stats: 19 disposals, 31 hitouts, 10 clearances
Penry stuffed the stats sheet with a big game from the ruck, imposing himself at the contest against a less experienced adversary. His 31 hitouts, 10 clearances, and seven tackles were indicative of that, as the over-ager freely plucked the ball out of the air and looked comfortable in possession. While hit or miss at times, Penry pulled off some nice passes by foot and won just about all of his own ball with 18 contested possessions.
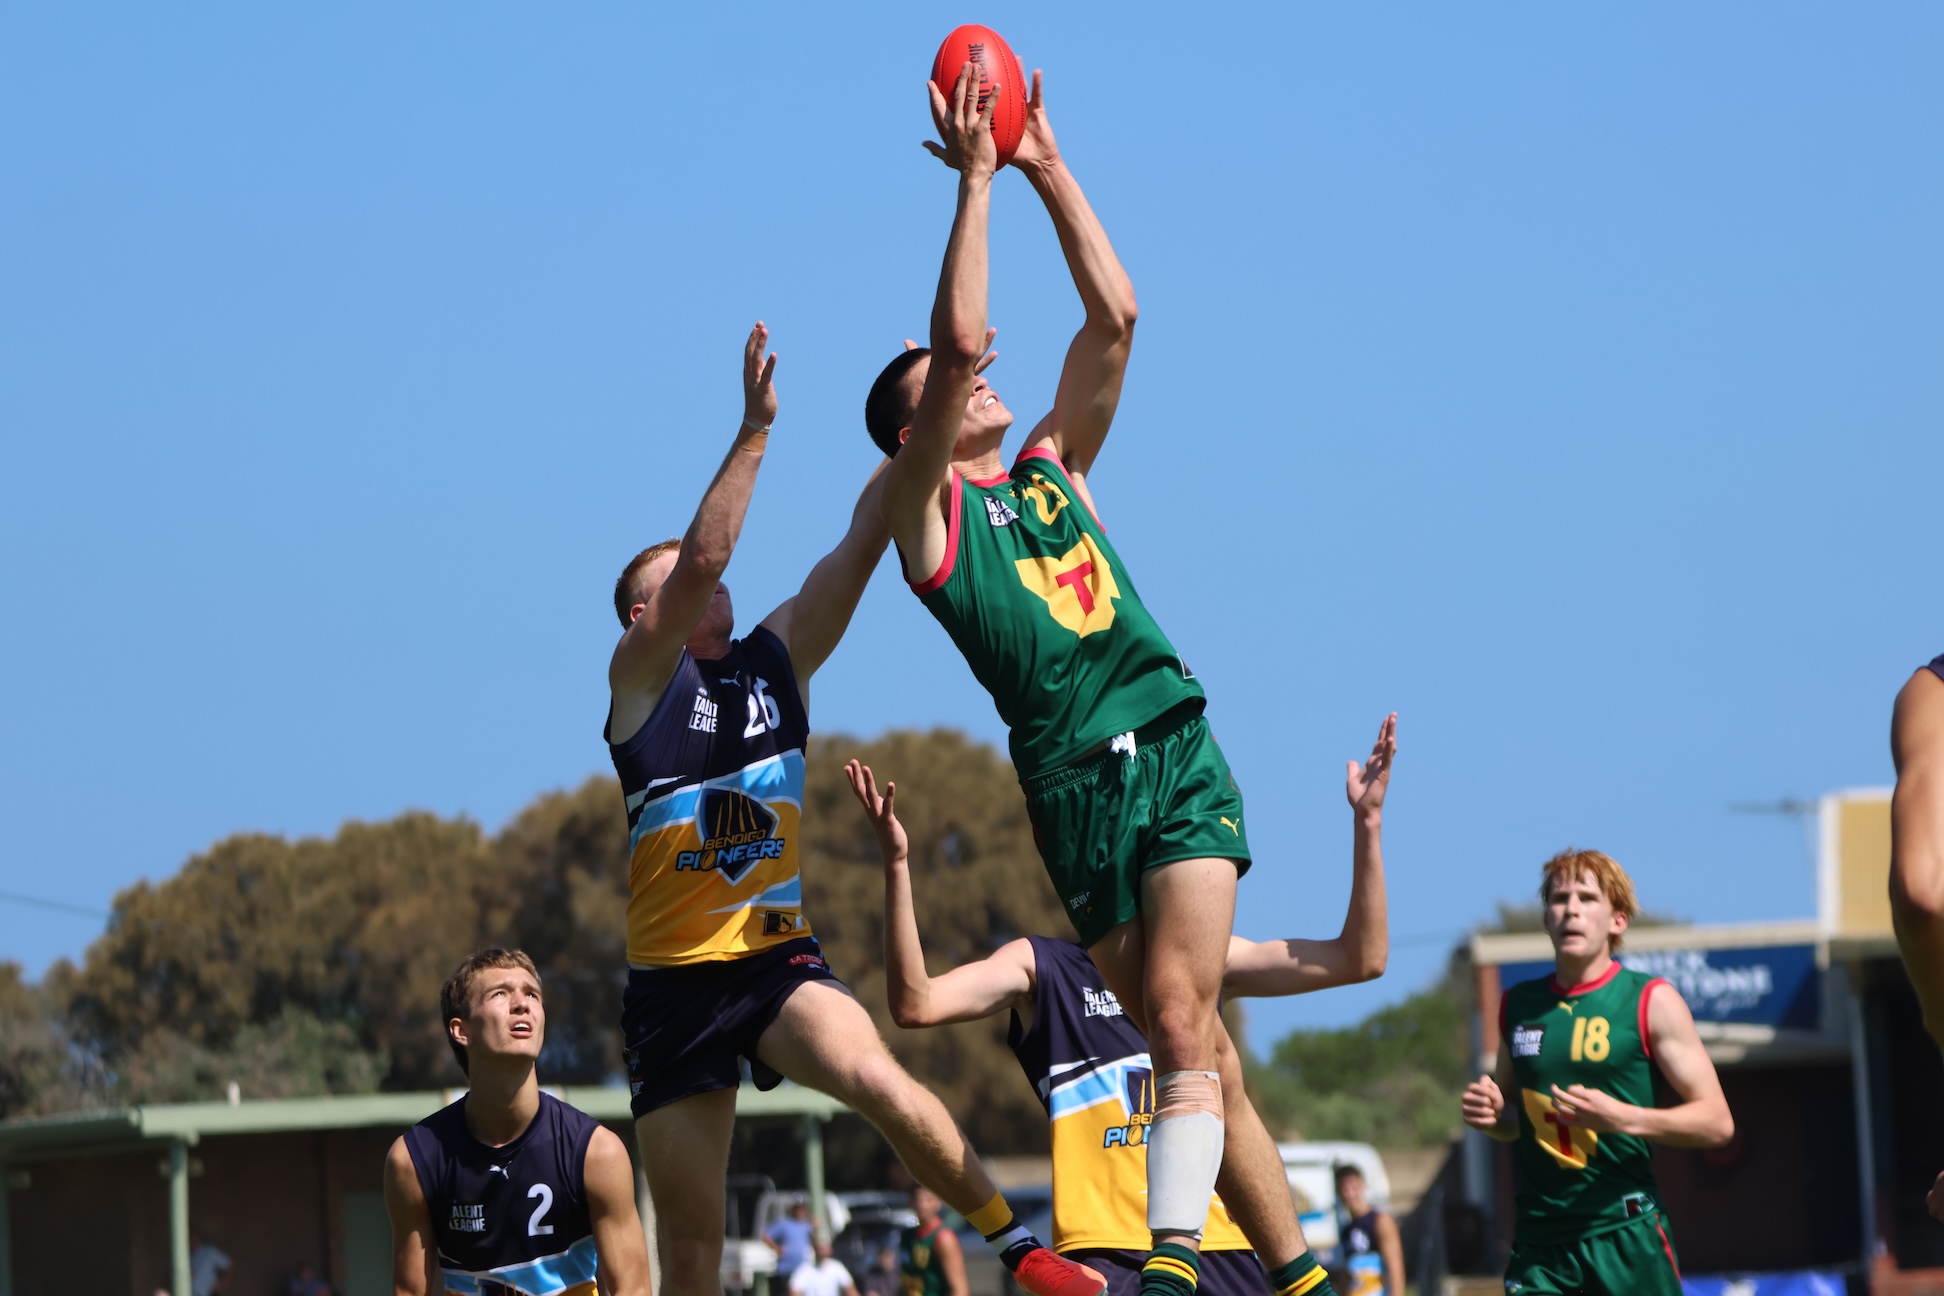
- Team
Tasmania Devils

Geelong Falcons

Tasmania Devils 14.7 (91) def. Geelong Falcons 11.12 (78)
By: Michael Alvaro
TASMANIA DEVILS:
#7 Jasper Hay
Key Defender/Ruck | 199cm | 10/05/2007
Stats: 8 disposals, 3 marks, 15 hitouts
Taking the matchup against Jett Elek both down back and in the ruck at times, Hay showcased his athletic traits and versatility. The National Academy member wasn’t afraid to venture high up the ground and get involved in Tasmania’s transitional play, though is still improving his overall defensive craft. He looked more comfortable when rucking after half time where his sizeable leap and willingness to follow up made for some eye-catching glimpses.
#12 Rylee McHenry
Midfielder/Forward | 179cm | 17/07/2007
Stats: 18 disposals, 9 tackles, 8 clearances
McHenry continues to be a tone-setter for Tasmania, but is proving to be more than just an effort player. Everything he did was full of power, taking ground in explosive bursts and imposing himself with tough tackles. The physical unit almost kicked a dream goal out of the centre bounce in term three and provided that speed on the outside to compliment his inside work. He seems to thrive off getting under the opposition’s skins and is not afraid to go in to bat for teammates or himself.
#19 Lucas Wootton
Midfielder | 179cm | 11/05/2007
Stats: 17 disposals, 9 tackles, 1 goal
Much like McHenry, Wootton balanced his game nicely in midfield with plenty of willing defensive acts. He’s a terrific tackler, sticking them against bigger opponents and forcing turnovers. Wootton’s strong running in attacking phases resulted in a goal out the front of the centre clearance in term three, and he showed great awareness when pressured to dish off handballs at all angles.
#22 Hugh McCallum
Forward | 179cm | 10/08/2008
Stats: 12 disposals, 4 marks, 2 goals
McCallum produced an excellent opening half, and although he only added three handballs to his tally after half-time, showed plenty of quality. The bottom-ager played the high forward role exceptionally well, leaning on his running capacity to track up and down the line. No opponent could go with him as he charged back to goal, using the ball effectively with diverse and creative kicks. McCallum also bagged a couple of majors to compound his early impact, slotting home nicely.
GEELONG FALCONS:
#4/6 Jesse Mellor | Geelong NGA
Midfielder/Forward | 185cm | 04/01/2007
Stats: 20 disposals, 7 marks, 5 goals
Mellor continued his goalkicking form to very nearly drag Geelong over the line having trailed by as many as 45 points during term three. He drew out ill-discipline from the Devils in a streak of three consecutive goals to cut the margin back to a single kick, finishing with five overall. The Cats NGA prospect lacked a touch of explosive speed in midfield but utilised his strong frame and clean hands to good effect inside 50 with three of his seven grabs being contested. He was difficult to match in the air and kicked truly after half time to turn the momentum around.
#13 Rilley Aquilina
Midfielder | 181cm | 27/11/2007
Stats: 12 disposals, 5 marks, 5 tackles
One of the many Geelong players who elevated their level after half-time, Aquilina benefitted from a move out to the wing. His ground level fumbles were replaced by more assured possessions out in space, though he still brought his typically fierce tackling intent. The top-ager tracked back nicely and was often seen burrowing into contests when his number was called, setting a great example for his teammates with physical efforts like his tackle on the opposition ruck in term four.
#19 Archer Chamberlain
Midfielder/Forward | 171cm | 26/01/2008
Stats: 22 disposals, 7 inside 50s, 1 goal
Chamberlain started forward but quickly became central to Geelong’s midfield plans as Mellor and Aquilina cleared out after half time. The diminutive bottom-ager was clean at the coalface, often roving the ball off hands and finding a way to move it into space. His evasiveness and ability to distribute cleanly made for efficient in-to-out midfielder, while his speed was useful when breaking forward. Like Mellor, he was also keen to get stuck into the opposition and test their patience.
- Team
Northern Knights

SUNS Academy
Northern Knights 4.10 (34) def. by Suns Academy 8.9 (57)
By: Michael Alvaro
NORTHERN KNIGHTS:
#2 Sebastian Murphy
Midfielder/Forward | 176cm | 23/10/2007
Stats: 36 disposals, 4 tackles, 8 clearances
One of a few players to be arguably best afield in a losing effort over the weekend, Murphy was terrific as the Knights’ standalone skipper. He started forward but quickly locked down his spot on-ball, playing in constant motion and reading the stoppages smartly. A smaller type, he drew six free kicks by going low and hard at the ball, and ended up with eight clearances despite Gold Coast winning the hitout count 52-28. Murphy’s turn of speed across the ground was complimented by gutsy efforts in the air as he looked to inspire his side against stiff opposition.
#23 Gabriel Stumpf
Key Defender | 196cm | 23/11/2006
Stats: 16 disposals, 7 marks, 1 goal
Stumpf has come on nicely as an over-ager, especially with a recent move to defence. Having spent all of last year as a ruck-forward, he still approaches the ball like a forward and that resulted in several intercept marks. He matched up on the dangerous Max Hudson at times and kept him to a single goal, patrolling Northern’s defensive 50 with confident aerial work. Stumpf was also entrusted with distributing the ball from the last line and was a little shaky in patches, but had no trouble dobbing a set shot from outside 50 after the three-quarter time siren.
SUNS ACADEMY:
#10 Beau Addinsall
Midfielder | 182cm | 09/03/2007
Stats: 28 disposals, 5 tackles, 7 clearances
Addinsall capped off a terrific Coates Talent League stint with more prolific work around the ball on Sunday. The consistent ball winner crafted clever stoppage exits and while he tended to go backwards out of the centre, made an adjustment to look forward which coincided with the Suns’ final quarter flurry. His ability to carve through congestion made him just about unstoppable at the fall of the ball, doing most of his work by hand on a day where others struggled by foot. He owned the centre clearances with five as seven other players managed just one each.
#13 Dylan Patterson
Defender | 183cm | 01/09/2007
Stats: 26 disposals, 6 inside 50s, 6 rebound 50s
A player who backs his strengths no matter what, Patterson provided constant drive out of defence and was able to penetrate both arcs throughout the day. His kick-first approach meant he delivered 20 of his 26 disposals by foot, although ran at 50 per cent efficiency with some loose execution. That didn’t deter the explosive talent from playmaking and taking ground with his usual flair, getting in good positions to overlap and make use of the Suns’ centre clearance dominance. He looks most dangerous when he’s decisive and direct as the primary rebounder.
#16 Cooper Collins
Forward | 189cm | 13/11/2007
Stats: 21 disposals, 5 inside 50s, 4 goals
Along with Leroy Kaesler, Collins was the hero of the day with three fourth quarter goals. His feats helped the Suns kick away to victory, breaking open the low-scoring affair to overcome a deficit heading into the final break. Doing his best work inside 50, Collins kicked back-to-back majors and ended up with the sealer in a rampant finish, converting well over the mark and in open play. He spent some time in midfield and has the running ability to get further afield, but is a tough matchup with his size and marking prowess closer to goal.
#34 Jonah Harris
Ruck | 196cm | 09/09/2007
Stats: 7 disposals, 5 tackles, 40 hitouts
While not a high possession winner, Harris was central to the Suns’ 9-3 centre clearance advantage and imposed himself with a total 40 hitouts. A physically imposing ruck, he was strong when engaging his opponent around the ground and showed a strong leap at the restarts. Harris also provided a contest when required by following up to tackle and attacking the aerial ball when contact was arriving. He capped off a consistent individual campaign for the Suns Academy.
- Team
Dandenong Stingrays

Calder Cannons

Dandenong Stingrays 11.9 (75) def. Calder Cannons 4.13 (37)
By: Michael Alvaro
DANDENONG STINGRAYS:
#3 Noah Hibbins-Hargreaves
Forward | 186cm | 16/11/2007
Stats: 13 disposals, 4 marks, 4 goals
It took next to no time for Hibbins-Hargreaves to put his stamp on the game in his return from a shoulder injury, booting the opening goal within five minutes. He went on to kick four playing exclusively up forward, showcasing his strong overhead marking ability and clinical conversion. The Stingrays skipper was typically tough to contain on the lead and would have gained a good deal of confidence dining out on what is his bread and butter in a comfortable win.
#4 Marcus Prasad
Small Forward | 167cm | 23/03/2008
Stats: 24 disposals, 5 marks, 1 goal
Prasad is nothing short of a livewire and again proved as much on Sunday. He worked up the ground as a key connection piece for the Stingrays, hitting up on leads before darting back towards goal. His creative ball use on the turn made for incisive playmaking and he was able to bring teammates into the game with unselfish passes going inside 50. Prasad also got on the board with a classy finish on the run in term three and was deceptively good overhead at just 167cm.
#11 Toby Sinnema | Melbourne NGA
Wing | 180cm | 11/12/2007
Stats: 24 disposals, 6 marks, 7 inside 50s
Sinnema was lively as ever in his customary wing role, looking to inject speed to the game at all costs. He seemed switched on from the outset with sharp work in possession and some gutsy contested efforts, though his ball use was tested later as he pierced passes around the body. Sinnema was dangerous when able to drive his legs into space, and complimented that outside run with a huge bump to send Adam Sweid out of bounds in the third quarter.
#29 Callum Smith
Midfielder | 189cm | 12/09/2007
Stats: 27 disposals, 5 tackles, 1 goal
Smith was arguably the Stingrays’ most effective midfielder on Sunday, gathering an equal game-high 27 disposals alongside partner in crime Sam Lewis. He built into the contest with strong tackle efforts and work rate, able to impact both at stoppage and on the spread. Smith made good reads to cut off opposition disposals in-tight or around the ground, and hardly looked rushed in possession. He capped off a productive day with a set shot goal in the final quarter.
CALDER CANNONS:
#3 Hamish Bird
Midfielder/Forward | 187cm | 16/08/2007
Stats: 20 disposals, 8 inside 50s, 1 goal
Bird set the tone for a solid outing with the opening centre clearance, getting good purchase on his kick out the front of the stoppage. He laid a strong holding the ball tackle shortly after and went on to become a factor in the front half. The top-ager helped the Cannons work the ball inside 50 with his marking and ball use, and he roved a contest well to dribble home his lone goal in term three.
#23 Adam Sweid | Essendon NGA
Midfielder/Forward | 175cm | 14/09/2007
Stats: 18 disposals, 8 tackles, 5 clearances
Sweid was typically hard-working in a losing effort, providing plenty of energy around the contest. He took ground relentlessly when playing on-ball, able to burst out of congestion and drive Calder into attack at speed. While hard to contain and physically sound for a smaller player, he could have taken a bit more time to steady on Sunday. An indicator of his competitiveness was shown after being wiped out by Sinnema in term three, only to get his own back with a tackle in term four.
#27 Jackson Barber
Key Defender | 195cm | 01/06/2007
Stats: 19 disposals, 10 marks, 8 rebound 50s
Perhaps buoyed by his recent Vic Metro squad selection, Barber returned a season-best performance in Round 7. He was absolutely everywhere across Calder’s defensive half, with nearly all of his 10 marks being intercepts. The co-captain relieved plenty of pressure with his clean aerial feats, though invited some of it back with a few misdirected kicks. Still, he saved far more scores than he gave up in a phenomenal performance, and was arguably best afield in a loss.


Scouting Notes: 2026 AAMI Talent League – Round 1
THE NEWLY renamed AAMI Talent League got underway on Wednesday night with a double-header at Coopers Stadium. Reigning premier Sturt powered away from Central District to win by 63 points in the season-opener, before North Adelaide did the same to Norwood in a 30-point victory at The Parade. The following night at Richmond Oval, Glenelg […]
Scouting Notes: 2026 U22 Women’s Summer Series R3 – Academy sides
SYDNEY Swans Academy took out the 2026 Under 22 Women’s Summer Series title with a perfect record in the round-robin after defeating GWS Giants Academy by 45 points on the weekend. Both teams entered the match undefeated, but it was the red and white side that emerged victorious thanks to eight goals to two in […]
Scouting Notes: 2026 Summer Series – Giants Academy vs. Swans Academy
THE SYDNEY Swans Academy has secured a Summer Series sweep, improving to 3-0 after beating the Greater Western Sydney (GWS) Giants Academy by 70 points on Sunday. A five-goal to one opening quarter set the tone in what was a dominant victory at Blacktown International Sportspark. The Swans carried on from their fast start to […]
Scouting Notes: 2026 U22 Women’s Summer Series R2 – Academy sides
AFTER another two big wins by the NSW/ACT Academies in the Under 22 Women’s Summer Series, we take a look at some of the Giants Academy and Swans Academy members who impressed at Henson Park over the weekend. The Giants crushed AFL Canberra with a triple-digit scoreline, while the Swans ran out 75-point winners over […]
Scouting Notes: 2026 Summer Series – Swans Academy vs. AFL Sydney U22
THE SYDNEY Swans Academy has maintained its perfect record in the 2026 Summer Series after defeating the AFL Sydney Under 22s by 62 points at Henson Park on Saturday. After conceding the first goal and going without one in the opening term, the Swans set up their victory with the next 12 majors. Returning star […]
Scouting Notes: 2026 Summer Series – Giants Academy vs. AFL Canberra U22
THE GIANTS Academy have notched up their first win of the 2026 Summer Series, after defeating AFL Canberra U22 by 13 points at Henson Park on Saturday. Despite having two fewer scoring shots, the more junior outfit brought the heat with plenty of run and pressure in the 9.6 (60) to 6.11 (47) triumph. A […]
Scouting Notes: 2026 U22 Women’s Summer Series – Academy sides
ROUND 1 of the 2026 NSW/ACT Women’s Under 22 Summer Series is in the books with both Academy sides recording impressive wins over AFL Canberra and AFL Sydney. The Swans Academy crushed the former by 138 points – restricting them to just one behind – while the Giants Academy overcame a third term fight back […]
Scouting Notes: 2026 Summer Series – Swans Academy vs. AFL Canberra U22
THE SWANS Academy was victorious in its opening Summer Series clash on Saturday, defeating the AFL Canberra Under 22 outfit by 31 points at Henson Park. Three unanswered first quarter goals set the platform for the more junior side, as they withstood each challenge to salute 8.11 (59) to 4.4 (28). It only took the […]
Scouting Notes: 2026 Summer Series – Giants Academy vs. AFL Sydney U22
THE GIANTS Academy has run out of gas in its opening Summer Series clash, going down to AFL Sydney Under 22 by 26 points at Henson Park on Saturday. After leading at the first break, the Giants were made to rue lapses in concentration, but showed good fight in the 6.5 (41) to 9.13 (67) […]
