Scouting Notes: 2022 NAB League – Round 13
AS the NAB League Boys season enters its final month, a bunch of representative stars have begun to filter back into the pathway competition. After a week off, the six fixtures produced a mixed back of results; from three nail-biting finishes, to an upset of the undefeated ladder leader. We noted some of the top performers from each region.
All notes are the opinion of the individual author.
- Team
Eastern Ranges

Dandenong Stingrays

By: Max Hughes
Reidy was good all day, playing as a midfielder who drifted forward and got dangerous around and inside 50. His goal in the first quarter was a ripper, a clinical finish from a tight spot on the run. Throughout the game he used his strong frame to clear a path and be an aerial presence, and he ended with 21 disposals. Reidy is a good athlete, something he showed on numerous occasions as he outmuscled his counterparts. Played a big part in the narrow victory.
#8 Cam Nyko
Nyko is a player who rarely fumbles when the ball is there to be won, and his clean hands were on display again on Saturday morning. He covered plenty of ground for his 21 disposals, having three inside 50s and 4 rebound 50s as a midfielder. His kicking is always excellent, displaying both penetration and touch, and he makes things happen when he finds the football. More of an outside midfielder than a contest bull, Nyko could look to bring a little bit more physicality into his game. Aside from that however, he was influential and classy throughout the contest.
#13 Callum Verrell
Verrell showed once again why he is the Ranges captain and a Vic Metro squad player, collecting 24 disposals off half-back. Staggeringly, 23 of those 24 possessions were kicks, as he repeatedly launched his side out of defence. A massive nine rebound 50s is testament to how effective he was in propelling the offence from the back half. Blessed with a powerful, penetrating kick, the Ranges look to him as they exit defence, as Verrell is one of a select few who can hit targets upwards of 50 metres away. Yet he isn’t just a bomber; many of his kicks showcase deft touch and poise. The complete rebounding half back at this level, Verrell continues to impress, and put another foot in the right direction against the Stingrays.
#18 Lewis Hayes
Hayes’ 30 possessions are slightly inflated due to his kick-out duties, but the rangy defender still marshalled the backline brilliantly alongside Verrell. An intriguing prospect, the 197cm key backman doesn’t play as tall as he looks, with a surprising ability to scoop up ground balls and rebound out of defence. Despite this unorthodoxy, recruiters would be very interested at the prospect of a giant, skilful centre half-back, a rare commodity even at the highest level. If he can put on some size and increase his physicality, Hayes will be just about the complete key defender.
#32 Cody Anderson
Anderson always gives 100 per cent, throwing himself into contests and tackling with ferocity. His one goal and 18 disposals stood out, as he gave the Ranges some serious grunt on the inside. Built strongly, Anderson is not afraid to throw his weight around, and he finished with seven tackles. He can be overzealous at times, giving away a few reckless free kicks, but the intensity that he operates at is a huge positive for his side, so the mishaps can largely be forgiven. A really strong game that set the tone for the Ranges’ intensity.
Frangalas had a strong game, picking up 19 disposals and kicking a goal. He is a powerfully built athlete with a great frame, and his strength was on display at multiple times throughout the contest. A beautiful centre clearance in the second quarter was a standout, as he swooped through the centre circle and picked up the football at full speed. It was an all-round performance from Frangalas, and he looked right at home operating on the ball.
Emile-Brennan was arguably the Stingray’s best, collecting 27 disposals off half-back. Most notably, 21 of those touches were kicks, highlighting the way he sets up the offence and launches forward thrusts. He is lightly built, but his composure and class stand out consistently. Emile-Brennan also works hard, covering lots of ground and providing a running option. In a similar mould to Jack Sinclair, he gets to the right spots and then almost always does something positive with ball in hand.
#16 Henry Hustwaite
Hustwaite had the most possessions of any Stingray, finishing with 29. He was fairly unassuming in the way he racked up the football but did a mountain of damage by hand. Both as part of the chain and in and under, Hustwaite worked tirelessly to get the ball in motion, and was the key cog in Dandenong’s midfield. His long handballing was a great feature also, pumping the ball out into space for his teammates to run onto. A very strong performance in a tight loss.
#19 Nicholas Collier
Collier’s one goal and nine disposals don’t jump off the stat sheet, but his presence inside 50 was significant, particularly in the first half. He is a livewire around the contest and bobs up opportunistically to make his possessions count. Had a real say in the second quarter, setting up and kicking a goal, the latter a great snap from a tight angle. Plenty to like about his game despite the low disposal count.
- Team
Oakleigh Chargers

Murray Bushrangers

By: Michael Alvaro
#3 Toby Murray
Clunking 10 marks from a haul of 13 disposals, Murray was among the dominant bigmen afield. The over-ager had an important role to play, starting forward before taking on a greater deal of the ruck duties as Josh Tweedale went down. His frame proved too big and strong on several occasions, as Murray rose confidently to clunk his marks – all to easily at times. He also snared a goal in the first term, converting a 40-metre set shot.
#4 Darcy Wilson
One of a few exciting bottom-agers coming through Murray’s ranks, Wilson continued his midfield apprenticeship with 20 disposals. The lightly built prospect may not have the power of others in his side’s engine room, but is happy to carry the ball and step through traffic. He had little trouble getting his hands on the ball, particularly early on, and tracked back well in the second half to continue to rack up possessions.
Perhaps a bottom-ager who flies under the radar as his numbers don’t always jump off the page, O’Sullivan again showed plenty of promise in key position posts. Having played mostly as a tall defender, O’Sullivan started there once again but was shifted forward in the second half. At both ends, he displayed wickedly clean handling both in the air and in open play, defying his size with composed pieces of possession. In particular, O’Sullivan’s ability to keep his hands free in tackles stood out.
After a shaky start, Cappellari worked into the game and ended up producing some positive moments. The left-footed wingman stationed well behind the ball while Murray attacked, but also snuck inside 50 to snare two goals with tidy finishes. He showed his smarts in those instances; taking an advantage close to goal, and staying down as a pack formed for his second major. At the other end, his disposal was a touch less decisive at times.
#14 Joeve Cooper
Rounding out a contribution of three bottom-agers on this list of Bushrangers, Cooper again got lively close to goal and generated four scoring shots. The number of opportunities he crafted from 10 disposals would have been higher, but Cooper ended up with just the two goals for his efforts. Both of his majors came during term three, and he just seemed to always find a way to get free inside 50, proving evasive as ever.
The dominant ruck afield, O’Keeffe continues to expand his craft outside of the initial contest. On Saturday, he displayed a good deal of confidence at stoppages to snatch the ball from mid-air and boot forward his own clearances. While also feeding his midfielders as usual, the 202cm bigman handballed well with seven from his 11 touches, and even ventured on a couple of runs as Oakleigh moved the ball away from the contest.
It was an indifferent kind of day for Ashwin, who was given the opportunity to prove his wares in midfield. Usually a winger, he arguably looked most effective when afforded the time and space to use his leg speed, rather than having to rush his kicks on the attack. The latter side of his game lacked a touch of composure, but Ashwin’s ability to break forward dangerously was an eye-catching feature as the contest opened up.
#17 Braden Andrews
Andrews was a key beneficiary of O’Keeffe’s ruckwork, from as early as the first two centre bounces. He started like a house on fire, reeling in the first tap with one hand and wheeling away towards attacking 50. The over-ager went on to accumulate a team-high 28 disposals and was difficult to contain as he slipped many a tackle. With slick handling and sound decision making, he looked like one of the more accomplished players afield.
#18 Jed Rule
A true mainstay for the Chargers in 2022, Rule was again reliable across the last line. Much like Andrews, his clean handling and composure made him one of the more polished operators for either side, in his usual defensive post. Rule had to balance his offensive output with a job on Murray tall Fletcher Hart, but clunked a few nice intercepts and got his kicking game going on the rebound.
#22 Tom Bower
The son of Nathan, who played 74 games for Richmond, is not eligible for father-son status but is paving his own path with the Chargers. Bower was stationed out on the wing and it was there where he made great use of his speed. The top-ager repeatedly gathered the ball and quickly separated himself from nearby opponents in a flash, surging into attack with great intent. Capping off a season-high 26 disposals, Bower also snapped a classy goal in the third quarter.
- Team
Bendigo Pioneers

Northern Knights

By: Michael Alvaro
Usually a midfielder-forward, Gallagher has racked up career-best numbers across half-back in his last two NAB League outings – including a whopping 44 disposals and 12 rebound 50s on Saturday. The speedy mover was aggressive in his willingness to push forward when Bendigo transitioned, proving a key creative cog for the Pios. Like many of the over-agers in Round 13, he seemed a class above at times in terms of polish, making great decisions and using the ball well in tight spots.
#4 Harley Reid
Having stood out as a bottom-ager in Vic Country colours, Reid looked to be a real game changer in the clutch moments on Saturday. He reverted back to an arguably more comfortable mid-forward rotation and got to showcase his strength at the contest, playing with his usual swagger on both lines. A great example of his footballing nous came to the fore early, as he dropped an overhead mark in wet conditions, before adjusting on his next lead to take the ball on his chest. Reid went on to launch 50-metre set shots, hand out fend-offs, take a speccy, and lifted with a crucial goal in the final quarter to only confirm that he is something absolutely special.
Another winner for the Pioneers in terms of role changes, Kiraly was utilised as a forward and also spent time on-ball this time out. The top-ager snapped the first goal of the game after a bit of Reid magic, and went on to prove evasive in his attacking work. While his disposal was not always slick in tight spots, Kiraly popped up with a bigtime goal in the fourth quarter to spark the Pios’ winning surge.
#10 Bode Stevens
Another over-ager who returned massive numbers, Stevens was sensational in the scrappy conditions. His strong frame suited the contested style of the game, and his early defensive efforts set a solid tone for his 37-disposal, two-goal game. Stevens rotated through midfield from up forward and his freshness to the forward 50 showed with his finishing at times, though those two majors came at important times for the Pios.
#19 Eli Pearce
There were plenty of Pioneers who saw their magnet shuffled on Saturday, and Pearce was no different. The versatile top-ager was sighted at the centre bounces as an on-baller, but arguably did his best work when shifted to defence. He was super clean in the tough conditions, proving a safe bet around the ground when challenged both in the air and at ground level. While not a massive producer numbers-wise, Pearce has those flashes of form that make him a prospect.
#32 Malik Gordan
A bottom-ager who is internally rated right up there with Reid, Gordan has similar traits and again put them to the fore in Round 13. The powerful unit broke to the outside quickly with his explosive turn, handling the wet ball with aplomb and launching dangerous attacks from the middle of the ground. His penetrative kicking also set up a late goal for Reid, and is an asset he can look to exploit.
#2 Nate Caddy
The powerhouse bottom-aged forward may not quite measure up at key position height, but owns his space like one and presents as Northern’s top marking target. His presence at centre half-forward was something to behold, as Caddy lead strongly and attacked the ball with vigour. While a touch scrappy at ground level, Caddy’s athleticism was also on show when he broke out the back, and Bendigo’s defenders could hardly lay a finger on him. His conversion could do with some refining, but two goals proved a handy return for Caddy in tough conditions.
A player you cannot fault for effort, Tomasiello again put up monster numbers in midfield, finishing with a stat line of 33 disposals, 11 tackles, and 11 inside 50s from midfield. The top-ager chained his possessions well and busted a gut when surging his side forward, carrying the ball into dangerous spots for his forwards to go to work. Having competed hard in the on-ball slog, that final kick was arguably what lacked for Tomasiello.
#16 Flynn Riley
One who seems to slowly be rising in confidence, Riley notched a season-best disposal tally of 12 for the second week running and had some positive moments throughout the game. The 205cm ruckman had a couple of shaky moments early on but built into the game, using his reach to mark and goal in the second term, clunking a strong grab on the wing in the following term. He capped his game with a double cobra celebration after another major in the final quarter.
#18 Sam Grant
Grant was a cool head in defence for the Knights, seemingly having found a home back there this season. The Vic Metro representative displayed good composure behind the ball in his efforts to intercept and move the ball along quickly, impacting aerially at 199cm and sliding in to mop up ground balls. His 17 touches and eight marks proved a handy return in the wet.
#26 Zak Johnson
Thrown into the thick of the midfield action in what was his third NAB League outing, Johnson looked immediately comfortable at the level. His composure in contested situations stood out, with his ability to keep his hands up and handball out in tackles proving handy. The 2006-born prospect also showed his smarts with a goal assist for Jason McCormick in the second quarter, poking the ball off the deck to his teammate.
#38 Matthew Ryan
One of a couple of Knights who had clutch chances to win the game, Ryan could not quite convert but put in a great shift overall. The strong-bodied midfielder topped his side’s disposal charts with 34, working hard to not only dominate at stoppage, but also impact when rotating forward or operating around the ground. He tended to dump kick out of congestion at times despite getting good penetration on said disposals, and he also popped up in attack during term four to convert one of his three scoring opportunities.
- Team
Sandringham Dragons

GWV Rebels

By: Declan Reeve
Playing predominantly through the midfield, Clarke was a big driver for his side heading forward, utilising his speed and evasiveness to break lines and hit forward targets. Whilst his flashiness on the outside was impressive, Clarke’s work through congestion and on the inside was equally eye catching, having a few moments where he demonstrated brilliant vision with his handballing. Becoming known for his toughness, Clarke was left winded after a heavy collision in the third quarter, but was right back into the thick of it after a brief spell on the bench.
Another game, another day out for Ashcroft who collected a game-high 42 disposals, bringing his usual class around the ground and well developed craft around stoppages. Once again Ashcroft’s work rate heading forward shone through, as he ran hard to get the ball back after giving it off and had multiple involvements in the same chain of play to keep driving his side forward. Ashcroft’s vision was crucial early on in the game, as he found a free option almost every time he had the ball, even when under pressure fresh from a stoppage.
#15 Ben Hempel
A season-high of 32 disposals was well and truly earned as he looked to work the hardest of all players on ground, pushing back and doing the defensive stuff but arguably offering the most damaging rebound as well. Hempel pushed up the ground when the ball was in Sandringham’s attacking half, positioning well to cut off rushed kicks, then often running up the field and kicking long to teammates in space. Despite his kicking being an obvious weapon, Hempel was balanced in with his disposal, spotting out aggressive handball options when there weren’t any further afield
#16 Harry Sheezel
Just another all-round superb performance from Sheezel, as his draft stocks keep rising so do his performances. Whilst the immediate eye catcher from the game were his four goals, the way Sheezel managed to impact the game throughout was impressive. In rather sloppy conditions, Sheezel stayed clean and composed with the ball, plucking over head marks and remaining one touch at ground level, the class he displayed was crucial for his goal scoring. Sheezel showed off some of his usual tricks around the ground, selling some candy and working through congestion in his usual manner.
#4 Michael Rudd
Playing above his 189cm frame, the bottom-aged forward seemingly marked everything that came his way through the contest, pushing up the ground to act as a link up option from defence where he managed to find space and separation from opponents. Heading forward, Rudd often looked to give the ball to teammates in central spots, but was sometimes let down by kicks lacking penetration.
#5 Jhye Clark
Whilst Clark started a little slowly, by the end of the game he was clearly the Falcons best on ground with his hardness at the contest and decision making under pressure playing a big part in Geelong’s final quarter surge. Despite taking some time to work into the game, Clark was constantly one of the first players to the ball from stoppages, either winning it himself and finding an option quickly or applying pressure to the ball winner. It’s not often a player looks to thrive more under pressure than when in space, but Clark did exactly that, seemingly hitting more targets when moving through congestion than when in space,
#41 Osca Riccardi
The Geelong father-son prospect had quite a productive game, especially when you consider the conditions. As a predominantly outside player, it would’ve been forgiven if Riccardi had a relatively limited impact, but through his work rate and positioning he was often used as a releasing option from the inside, taking ground with his speed and using the ball superbly. Riccardi was arguably the cleanest player on ground, rarely wasting a disposal and playing a big part in Geelong’s final quarter surge.
- Team
Western Jets

GWV Rebels
By: Michael Alvaro
#45 Jovan Petric
Utilised as Western’s rotating ruck-forward, Petric got back in the scorebook as one of two Jets to kick multiple goals. The Vic Metro representative really came into his own during the second half, as he began to have a greater say up forward. Petric did well to combat the conditions with a couple of marks up the ground, before snaring his majors in term four. One was a fantastic snap in open play, while the other was a 50-metre free kick conversion.
#53 Logan Morris
Perhaps inspired by the recent visit of English soccer sides, Morris seemingly transformed into a ground ball specialist on Saturday. The bigman displayed great smarts in the conditions, finding greater success converting off the deck than he did with set shots. With two majors, his quick thinking saw him send the ball home from close range, acting on instinct as the Rebels defenders scrapped away deep inside 50. That ability to adjust with his marking game effectively nullified, was terrific for the Jets.
One who has converted himself into a midfield accumulator this season, Sinnott racked up 26 touches and four inside 50s in another solid outing for the Rebels. He became more effective as the game wore on, finding more space to take up before sending his side into attack. One of Sinnott’s best plays was a one-two foray in the third quarter, proving his ability to impact as an asset on the outside.
#5 Aaron Cadman
Cadman’s goalkicking feats continued on Saturday, as he booted a game-high five majors in much different fashion than he is used to. While seemingly concerned with his ability on the lead, Western shut that side of his game down well in the wet, but Cadman was still able to score. Whether it was snapping home from the pockets or taking full advantage of the free kicks he earned, the top-ager cemented his top 10 credentials by proving the versatility of his forward craft. Even with the weather and attentive defenders working against him, he found a way to win his side the game – including with three consecutive goals in term two.
#7 Hugh Bond
Having played a role in defence for Vic Country, Bond reverted back to his usual midfield post in Rebels colours. On the soggy deck, Bond’s step and turn of speed helped break the game open as GWV attacked, with his power shining in those situations. The top-ager also prized several shots on goal, converting one of four with a snap in the third quarter. His style of play certainly suited the conditions, as he also laid seven tackles.
#23 James Van Es
An absolute rock on GWV’s last line, Van Es again wrestled with solid opponents and for the most part, came out on top. He only finished with four marks but had a greater intercept influence than that number suggests, throwing his weight around with authority across defensive 50. One of his best moments was a one-handed pluck in the second quarter, as he essentially swallowed everything which came his way.
- Team
Tasmania Devils

Gippsland Power

By: Peter Williams
The Allies representative forward had a lot of chances, but could not quite make the most of them, booting 1.3 and having a couple of no scores. Had had a number of flying shots as well as set shots, but his first major involvement came via a goal assist with a great handball to a teammate for a running major. He finally got on the board after winning a high free kick 45m out and received a 50m penalty when his opponent let the umpire know he disagreed with his decision, from which Leary responded with a goal from point blank range.
Won his fair share of the ball, but most of it came in the third term where he really got involved in transition. He won a lot of handballs in close and was able to use the ball reasonably well, though did look indecisive on a number of occasions and would sell himself into trouble. He produced a lovely low bullet pass inside 50 to McKercher in the final term, but unfortunately his teammate missed the subsequent set shot.
#15 Lachlan Cowan
Unsurprisingly one of the Devils’ best and the general in defence. He showcased his booming kick time and time again, often clearing the ball from danger long down the line. At one stage he thumped it from centre half-back to centre half-forward, or from full-back to the wing, though it was not his most efficient kicking display. At his best, Cowan has a potent kick that can go into dangerous positions, but he can tend to shank the odd kick or even have a scrubber as was the case in the second term where it did not quite connect cleanly with his boot. Still, Cowan was productive and found a ton of the footy, particularly when kicking out from full-back and looking to put the ball into the middle.
#27 Colby McKercher
Having a really busy first half before having a quieter second half, McKercher provided plenty of run and carry on the outside for the Devils. He has a long kick that is generally effective, and he won the ball in all thirds of the ground. He had a quick shot on goal at one point in the opening term, then was involved in one-twos in the defensive half not long after. He had a nice fend-off on the wing and was so clean in close by hand, often having to get rid of it quickly. McKercher was a good decision maker y hand or foot and though he did drift out a little in the second half compared to his third, played forward and even had a shot on goal, which unfortunately he missed.
#9 Zane Duursma
The eye-catching forward-midfielder had a purple patch in the second term that really got the Power going, kicking Gippsland’s first three goals of he match. They all came in the space of eight minutes, with two set shots and a clever snap off hands, though the first set shot was from a high free kick, whilst the other was a great read of the play to intercept inside 50. Duursma started the last three quarters in het middle and had the first clearance each time, thumping it long to put pressure on the Devils defence. He does not need a lot of the ball to have a great impact, and though others had more of it, he always looked dangerous with it when he did have it.
#22 Archer Reid
A real presence around the ground, Reid not only impacted aerially, but used the ball supremely. He hardly made a mistake from his 12 touches, also taking six marks and able to cover the ground really well. He took risks with his kicks that paid off, and when needing to slow it down, hit the short, regulation pass. Missed a set shot in the fourth term he should have nailed from 45m, but otherwise was a really impressive player across the match, particularly when the game heated up in the second half.
#27 Cooper Vickery
Worked into the game nicely after having an okay but quieter start, with Vickey particularly impressive in the third term. He applied great pressure throughout, winning the ball on the outside as well as in close, then would go back into defence to provide some movement. He won a number of his touches at the coalface then would find himself in space, often looking to kick long down the ground. His execution was not always perfect, but Vickery did cap off his day with a great running goal in the ninth minute of the third term to hand Gippsland back the lead.
#37 Max Walton
Amassing the most touches for his side, Walton had a real crack throughout the four quarters. He started on the wing and covered the ground really well, moving into stoppages at times and then winning it in transition and kicking long from half-back. Though he could have been a touch cleaner at ground level and with his disposal, Walton was to apply good pressure in close, and win the ball in all thirds, providing run out of defence, and then along the wing going inside 50. He kept running even to the final siren with a late one-two down the middle in the last 90 seconds of the match.

Scouting Notes: Lions fight off plucky Falcons
SUBIACO has resisted a late West Perth charge to come away four-point victors in their Round 15 clash at Leederville Oval on Saturday. Spearheaded by four goals to Thatcher Simmons, the Lions led all day and held on despite conceding the last three majors, seeing them pegged back to within a kick. With the Under […]
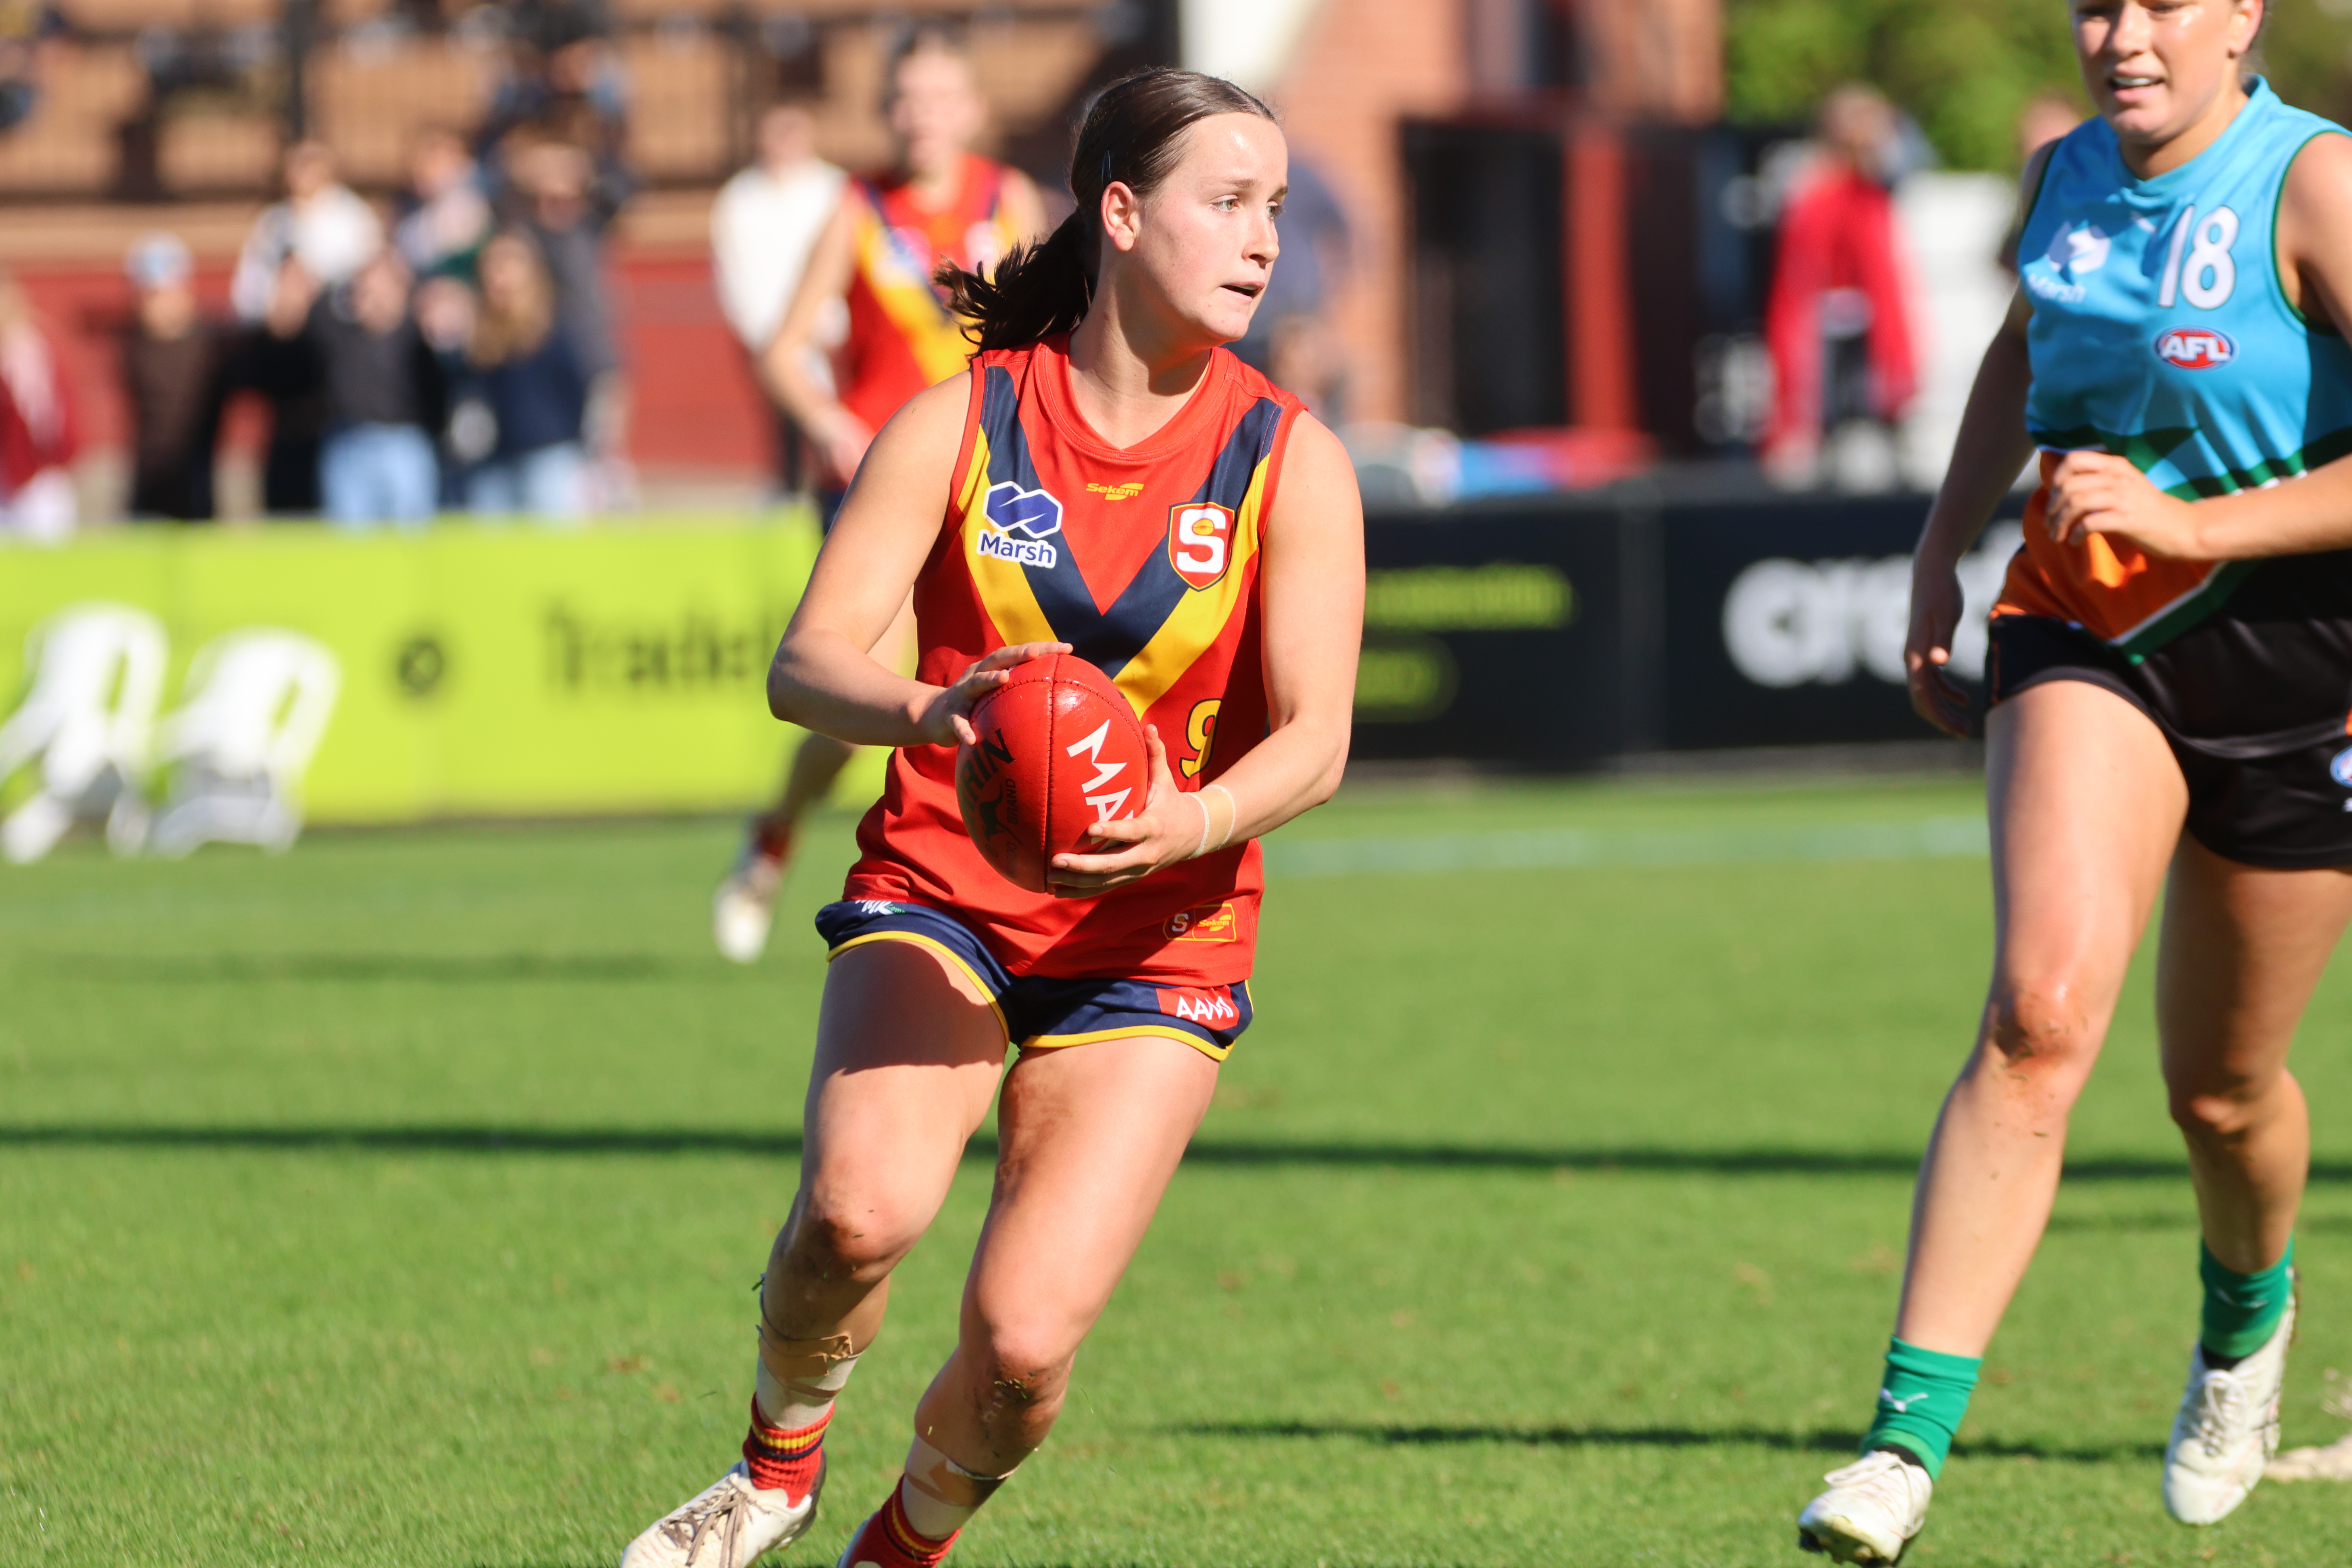
State Academy notes: 2026 SANFLW – Round 11
ROUND 11 of the 2026 SANFL Women’s season saw the State Academy members back in action for a second round since taking out the national title, continuing to build and show their class across the four games. We took note of how each of the Academy members performed in the latest round of action. All […]
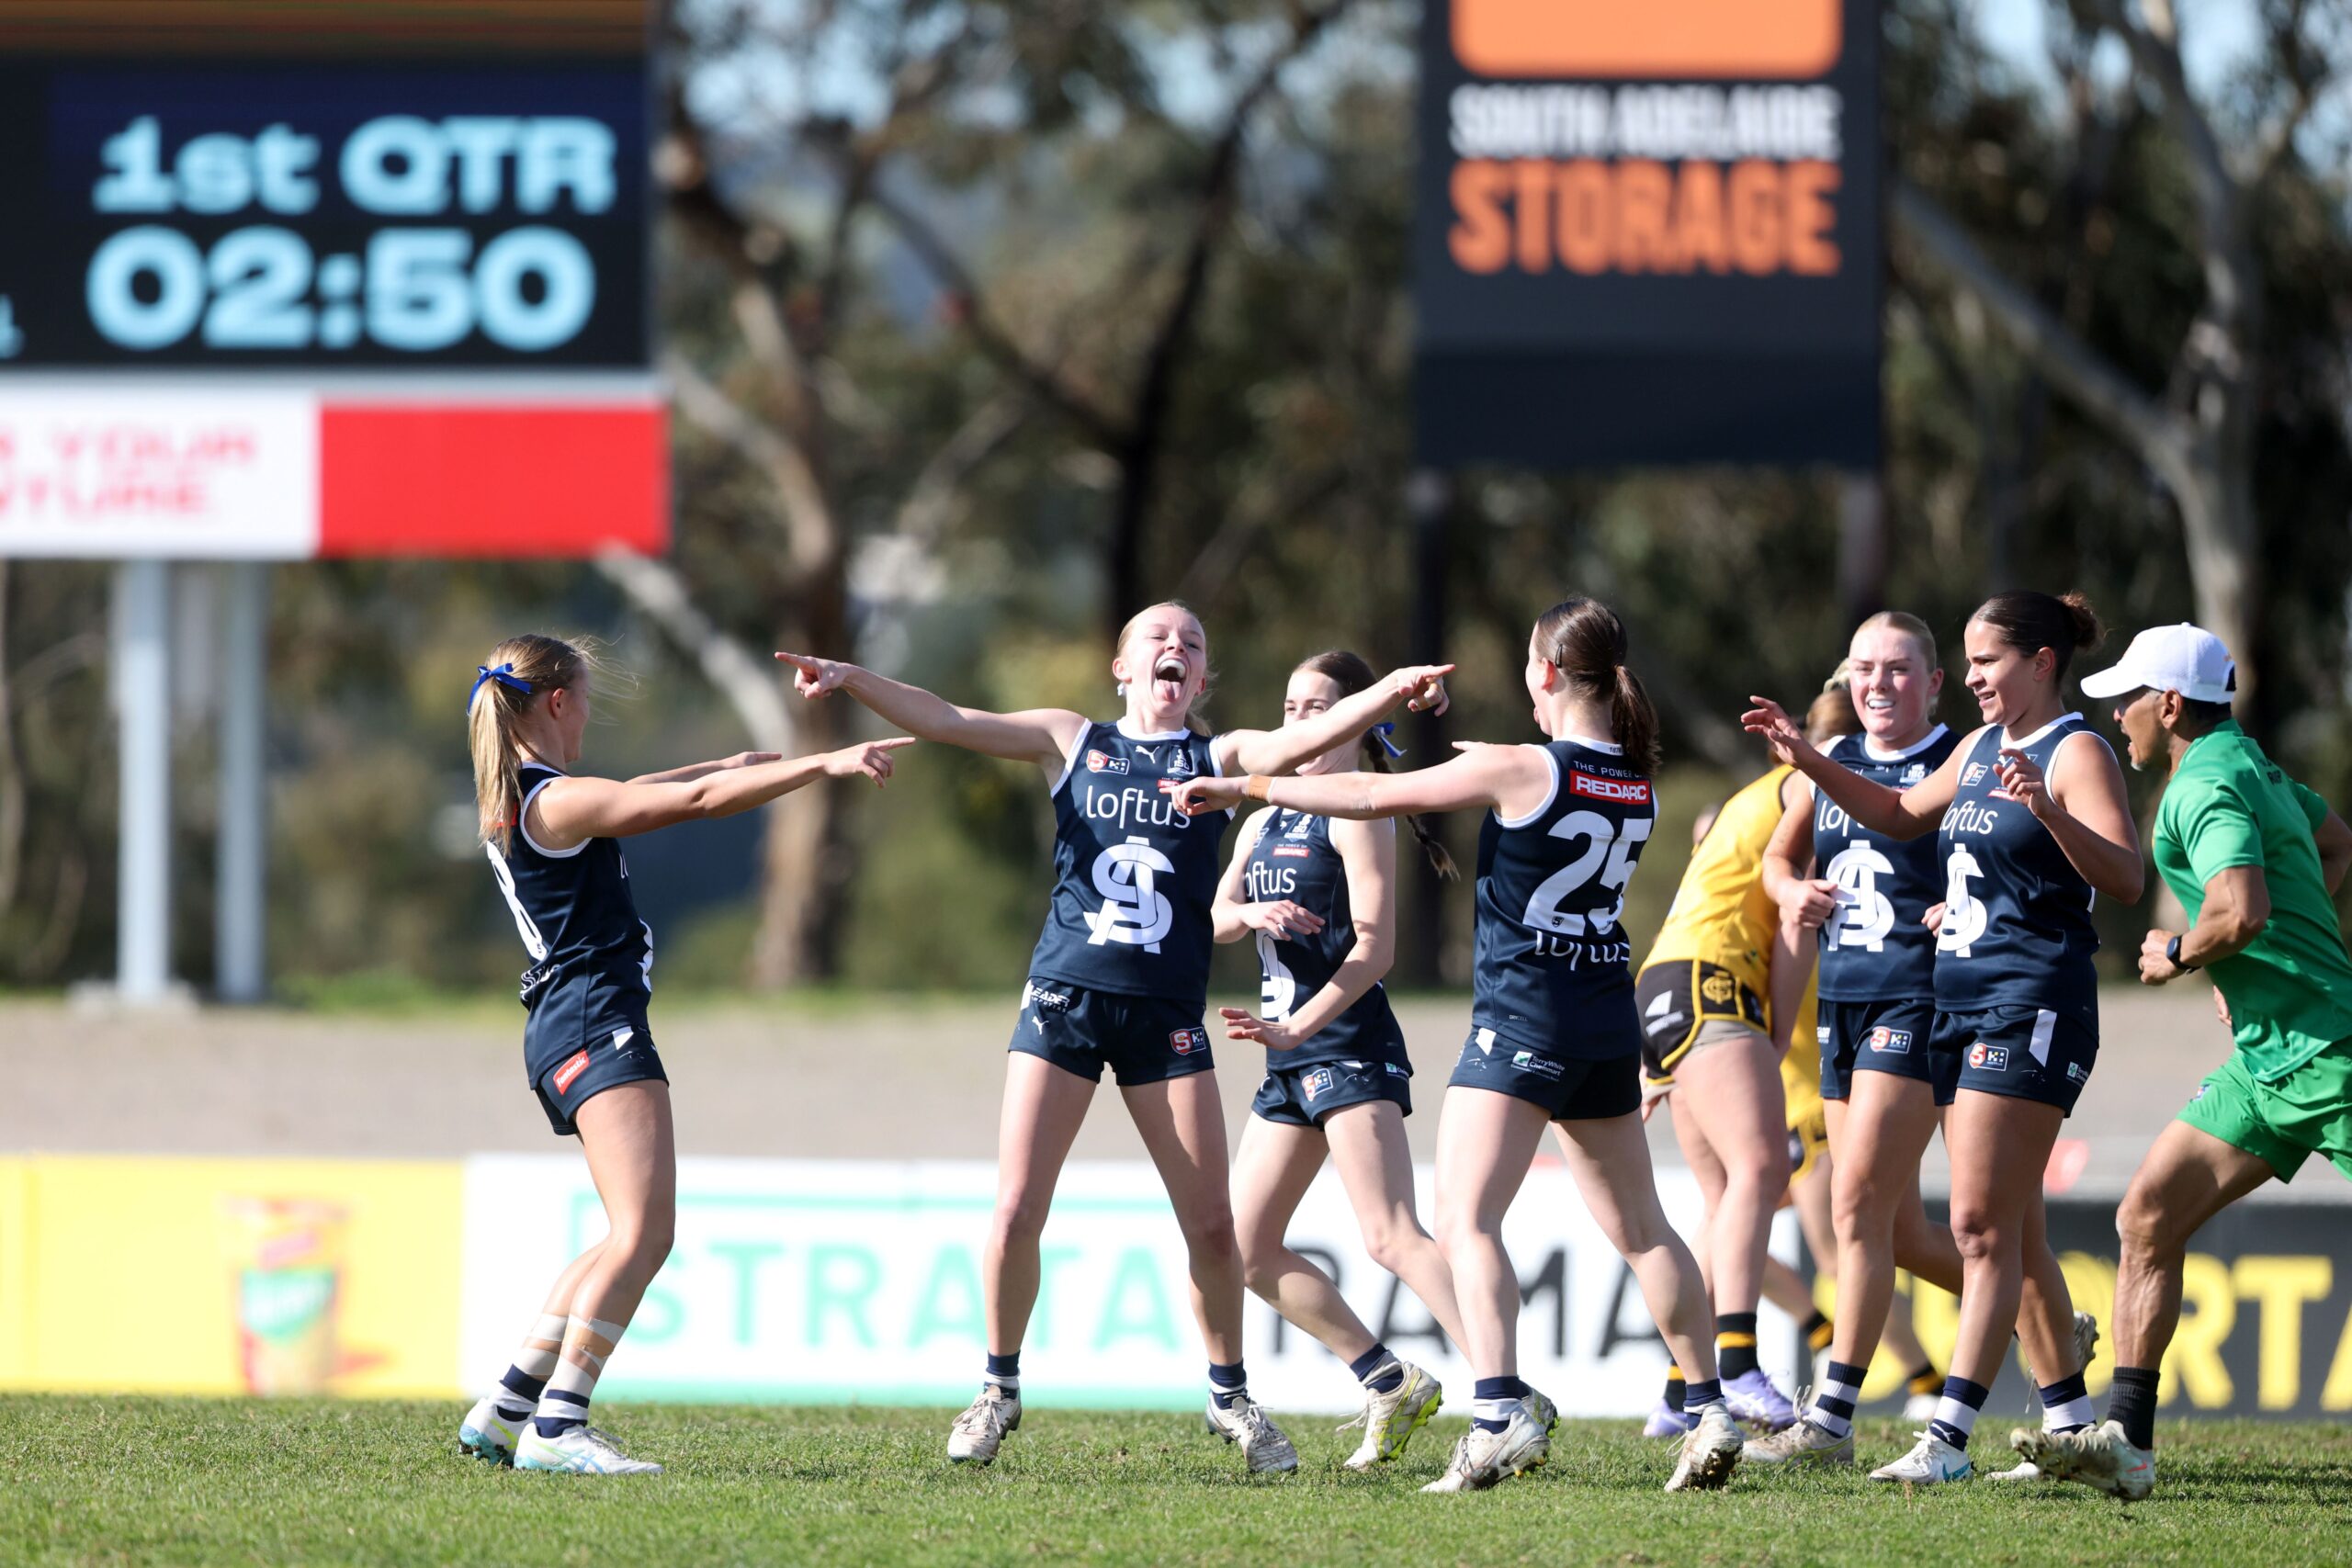
Scouting Notes: State stars shine as Bays beat Panthers
GLENELG has flexed its scoring muscle in the second half to remain fixed in the AAMI Talent League top four with a win over South Adelaide in Round 15. The Bays kicked away with six goals to two in the third term at Stratarama Stadium and always seemed to have an answer for the Panthers […]
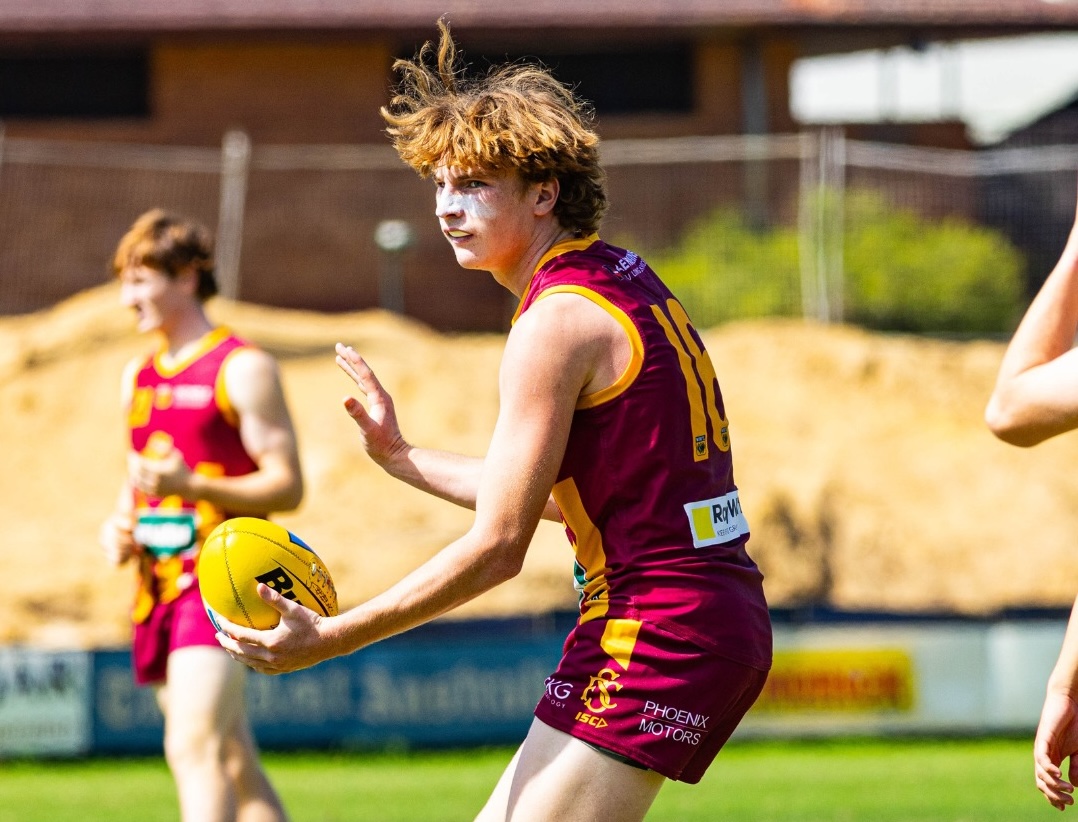
2026 State Academy notes: WAFLW – Round 16
ROUND 16 of the WAFL Women’s season saw the return of the West Australian Under 18s players following the conclusion of the national championships. With the State Academy members back in club colours, there were plenty of standout performances across the four matches as players looked to finish the season strongly. We took note of […]

2026 Talent League Girls R16 notes: Tasmania Devils vs. Sandringham Dragons
SANDRINGHAM Dragons secured an impressive 7.11 (53) to 5.4 (34) victory over Tasmania Devils on the Apple Isle in Round 16 of the Talent League Girls competition. The Dragons took control of the match by kicking the first four goals of the second half to establish a commanding five-goal lead, before the Devils fought back […]
2026 Talent League Girls R16 notes: Bendigo Pioneers vs. Geelong Falcons
GEELONG Falcons won the battle between two of the single win sides over the weekend, defeating Bendigo Pioneers by 54 points in a comprehensive performance at Queen Elizabeth Oval. Despite missing Vic Country MVP Ava Bilyk and National Academy member Greea McKeegan, the Falcons piled on seven goals to two in the first half and […]
Scouting Notes: Dragons’ late surge downs Devils
SANDRINGHAM Dragons have kicked away to a 41-point victory over Tasmania in their standalone Round 19 fixture on Sunday. The visitors were potent throughout the day and kicked nine goals to two at one end of North Hobart Oval to run out with a comfortable, albeit slightly flattering, winning margin. The Devils regained several of […]
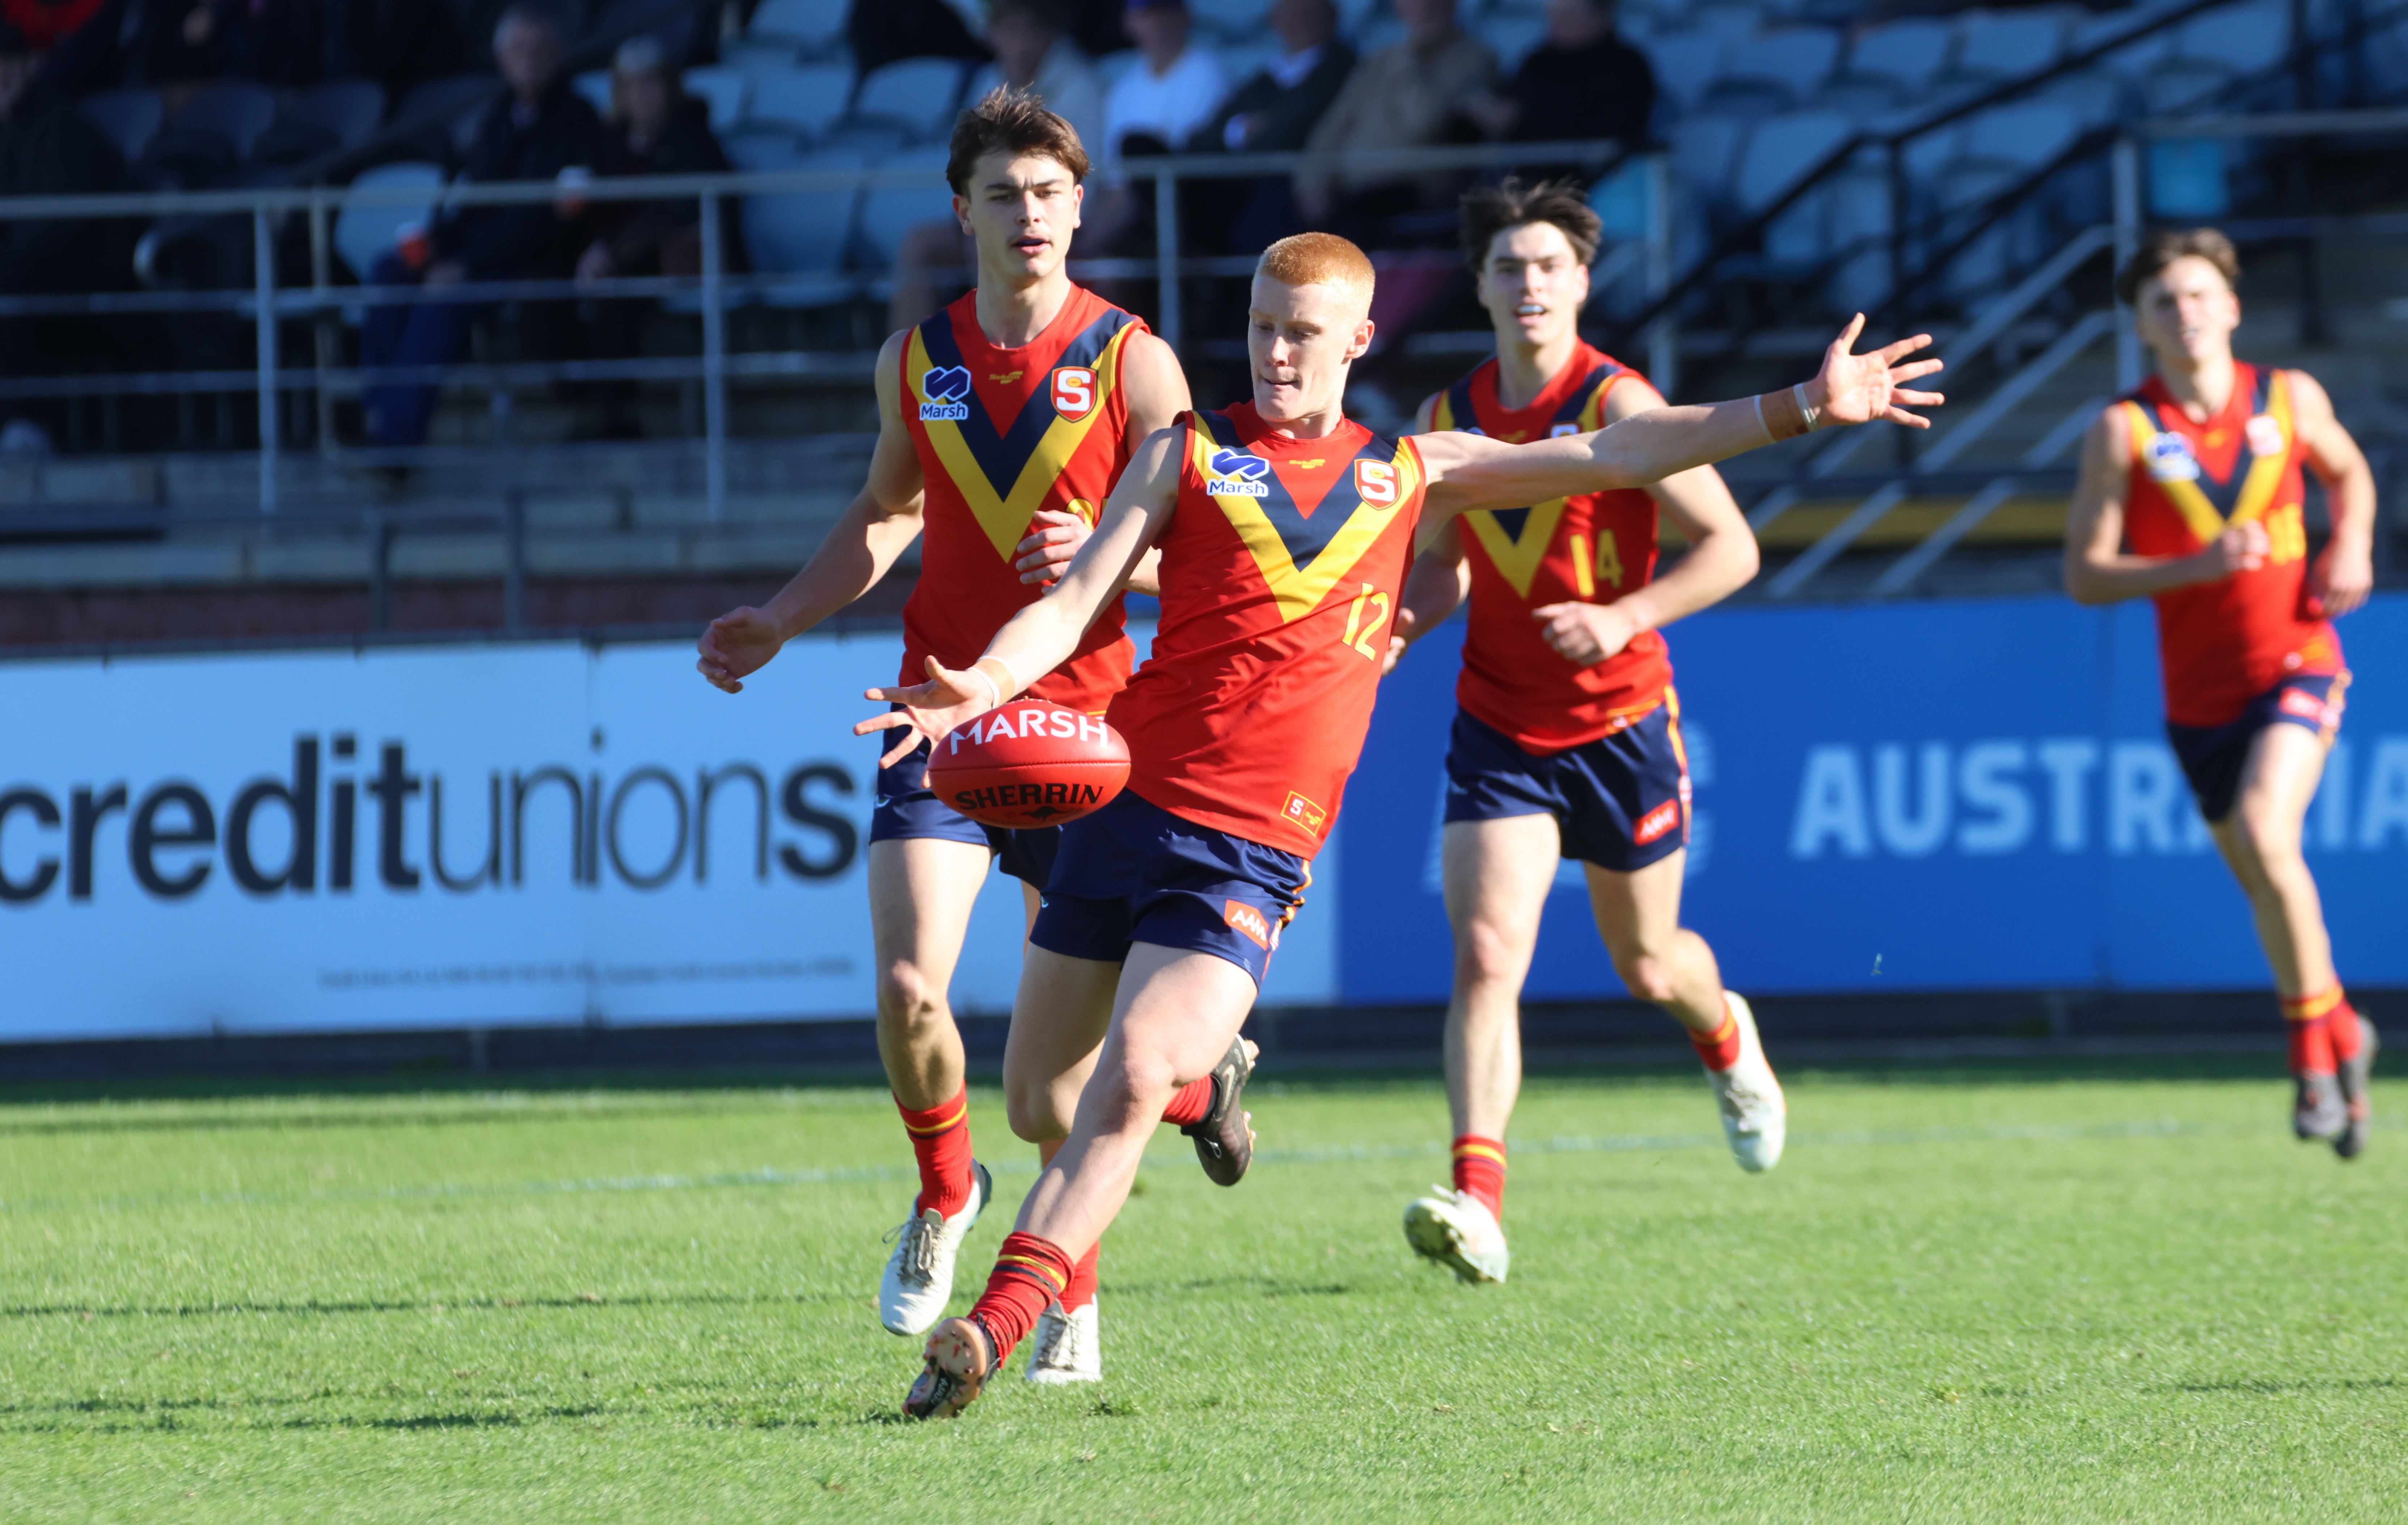
Scouting Notes: 2026 AFL U18s – Vic Country vs. Vic Metro
VIC METRO has completed an undefeated Under 18 National Championships campaign after thumping rivals Vic Country by 92 points at Mars Stadium on Sunday. The newly crowned champions piled on the first 11 goals of the game, setting up their comfortable victory with 13 to one in the opening half. A 35-22 clearance trouncing helped […]
2026 Talent League Girls R16 notes: Calder Cannons vs. Murray Bushrangers
CALDER Cannons continued their season as the top metropolitan team as it stands, producing a 19-point win over Murray Bushrangers in Round 16 of the Talent League Girls season. In a tough day for kicking straight, the Cannons booted six of the nine final term behinds on their way to a 5.13 (43) to 3.6 […]
